
Random Thoughts on Piping
How to Tune the Band For Winning Competitions or Performances
To a Pipe Sergeant or a Pipe Major, the drones will never lie. Neither do your ears - tuning drones takes patience and experience. Blowing scales to tune a group of pipers is useless, and trying to use a tuner on a chanter in a band or group setting is just futile. But when the pipe major tunes drones so they are all tuned and lock together as a group, the effect on the melodic sound of the ensemble is amazing, even if there is a small variance in the chanters - but when they’re not tuned, it’s truly awful. What I mean by this is that tuning a band cannot ever be a “near enough is good enough” thing.
Before we get into that, you actually do have to start with the chanters. That is, which ones are you playing? What reeds are you playing in it? What is the pitch of low A when high A and low A are an octave apart without any tape on either note? Are there any notes consistently flat with this chanter/reed combo?
Why all these questions? Well, to tune drones, you need to pick a collective pitch for the band, which has to be the average pitch of all the chanters together that day. Ideally, it’s the pitch that everyone’s low A and high A tune to without any tape on either, and hopefully you’ve got no flat notes, only sharp notes, in between.
How to tune the band - step by step.
Form a circle once everyone has their pipes reasonably in tune, and be adamant that everyone has five minutes to get ready. Once you all start playing a tune in unison, using a basic (i.e. cheap) tuner, check everyone’s chanter one by one, see where each low A and high A is pitching and begin to average them out. This will serve as the reference pitch to set ALL the drones to for the day.
I am painfully aware that pipe chanter reeds are variable enough even among the same maker’s batch. Bamboo is a living tissue, so there is always going to be some variability. You’ve also got these new fangled band chanters with oval holes, effectively pre-carved for your convenience, or a screw that raises and lowers the reed seat. The reason gadgets for bagpipes sell so well is because there is always a piper who thinks the gadget will help make them a better player. Trust me - no matter what or how wonderful the sales pitch, it doesn’t, and anecdotal praise is only worth the paper it is printed on. A wealthy piper has figured out how to market a “must-have” gadget. How many of us still have a “piper’s third hand” unused in our pipe cases? Me too. So, what then?
Once you have an average pitch that is readily attainable among the variation of chanters and reeds you all have, adjust the reeds and tape. Some chanters will need the reed sunk in a little farther to get the low hand up to pitch, some will require a bit of tape on the top hand; some chanters will need the reed a little farther out to get the top hand flat enough and/or maybe some tape on the bottom hand. It goes all ways. But you have to pick a pitch that everyone can achieve, an average for the band that day. Point of all this is: you set the average pitch that you can get any of your chanters to with their choice of reed.
Now that you’ve picked the pitch, it’s only good for one day. Why? The ambient weather conditions will always dictate your chanter’s absolute pitch. It’s one of the joys of playing this horribly finicky instrument, so just go with it. However, everybody’s chanters are pretty much going to change pitch the same, so don’t worry about chasing down the specific pitch from your band hall last week, just see where all the chanters fall on the day. BUT! For now we’re going to assume you’ve averaged your absolute band pitch.
We’re going to say you’ve picked the number 474 Hz for your band’s low A, because everyone can get there. Rough tune every band member’s chanter by mouth blowing the chanter at a tuner set at your working pitch. What this means is that if you set the tuner to 474, it will read that day’s A when you play low A or high A. If you set the tuner to 448, the tuner should say Bb. It’s the same thing.
Mathematics is essential.
Here’s where the math of music is needed. 440 Hz is the standard concert A these days and Bb is roughly 466: 466 – 440 = 26 Hz. 474 – 26 = 448 (For you math geeks - This is actually wrong, you should divide 480 by the twelfth root of two: 480 / 2^(1/12) ~ 480 / 1.05946 = 453.06 Hz, but the former is drummer easy, haha).
Some people use the Bb convention (453) and some people use the A convention (480). Just pick one, but once you choose it, stick to it. Probably best if you’re going over 480 to use the Bb convention because most Korg tuners don’t go any higher than 480. If you need to learn how to use a Korg tuner (or other chromatic tuner) to tune a bagpipe, google it. Of course, you could be using a bagpipe specific tuner (cough - BLAIR - cough) which does all the math for you and can be calibrated to suit the weather.
Back to the subject at hand, rough tuning the chanters. This is really approximate. Why? Because everybody blows the chanter in their pipe differently. Once you get their chanter in their bagpipes, once they pressurize their bags, everybody is going to blow different than you did by mouth. No worries, I’m just operating under the assumption that you might be ‘hearable’ by the public during your band rehearsal and we don’t want to be sounding like total crap from the get go. You should only have to do this once for each chanter: when it gets a new reed. This should never be an every practice thing. So, how does this work?
Watch a world class band tuning up. Notice that the pipe sergeant and the pipe major get everybody playing a tune together, then they start tuning all the drones. None of this nonsense where pipers all walk around individually warming up pipes, wasting time. Why? Some guy is going to play the whole time straight. Some other guy is going to diddle with his corks, drones and chanter reed and play about 30 seconds. Some guy got to practice 30 minutes early and hasn’t quit playing yet. This is crap time, and has got to stop.
Band Discipline for a Performance
Everybody now should form the circle, get your pipes up, and play a basic tune set together while one member tunes drones to the average of low A. If you’ve got a dedicated non-player who knows how to tune drones, that’s super cool, because 99% of bands don’t. In most cases, the PM or PS should be the tuner guy, meaning his pipes are on the table not doing anything while he/she is going around the circle with a tuner set to the reference pitch tuning everyone’s drones to that pitch. Once all the drones are tuned, everyone should be able to hear the clarity and be able to really produce.
There is no magic here. The old idea of one player with the master chanter that everybody else tunes to is all well and good, until it’s not. That piper is doing more playing than everybody else, which can be a bad thing. He - or she - is usually one of your best players, and you don’t want to wear him out before your performance. Also, you’ve got him playing over and over again, and everybody else is either fiddle - farting or sitting around until it’s their turn to tune. That means everybody else’s chanter is going to go flat while they’re sitting around and you aren’t going to have a clue where their chanter really is pitch wise when it comes to be their turn. For a band, this practice is just wasting time and reinforcing inefficient technique.
Tune all the drones together
I designate someone to go around and tune each player’s drones during the warm up, setting them with a tuner to the reference pitch we got from averaging everyone’s chanters during the rough tune. After the first 5-10 minutes of playing we’re going to easily know whose chanters really aren’t so close, but the drones will all be locked and steady. Next, they go around the circle and have each person play a little snippet individually. Scotland the Brave is great for this. You hit low A, C, E, and high A in the first 2 bars and big D’s and F’s in the 3rd bar. Takes no time at all to figure out how far out their chanter is from their own drones. Now they can fine tune the chanters to the drones by moving their chanter reeds and add or subtract tape to get everyone close to the reference pitch.
Again, you tune the drones to your chosen reference pitch and then you tune the chanters to the drones, NOT THE DRONES TO THE CHANTER. The drones will always be playing in a players ear and so they will instinctively blow tone to their drones. Important: the guy with the tuner should be making sure the guy who is having his chanter checked against his own drones has had his drones still tuned to the reference pitch, because some drone reeds may change after a few minutes of warm up. Drones should ALWAYS be tuned while a player is playing a tune! NOT scales, not low A, playing a TUNE!
That is it. It’s that easy. Once the drones are all in tune and the chanters are fine tuned, go around once more checking each player’s internal consistency, while they play as a band some more. Rest, then go around solo again. Recheck individual chanters against the drones!
Too Long, Didn’t Read Summary
All too often, bands will check chanters against a master chanter, and then work on tuning drones. Most notes are pretty close, one note a little off, so they move a piece of tape and call it good enough. But hey, that guy’s reed really could just be pushed in a little farther, and using drones would help easily figure that out.
A point to think of - forget playing the scales. There’s this E, B, low A, low G, low A, B, C, D, E, F, high G, high A thing going around. Why, I have no idea. No one blows the same with this little dinky scale exercise as they do playing an actual tune, so don’t bother trying to tune to it. If you do use the scale, play it then belt into “Loch Rannoch”, and check drones tuning then, because actually producing music here is where your ears don’t lie.
Tuning to the drones makes it easy to individualize chanter tweaks. You have to be able to tell if the guy’s chanter is just a little out of tune with his drones. You’re looking for general flat or sharpness. The chanter balance is either flat, in tune, or sharp to the reference pitch as indicated by the drones. Until you get the right balance, farting around with fine tuning is pointless because you haven’t even gotten the reed at the right depth in the chanter yet.
Also, don’t be afraid to use hemp on chanter reeds. Hemp may be either giveth or taketh away - too easy. Chanters with threaded reed seats are quite handy, but if you don’t have threaded reed seats, reed height adjustment should be made by changing the amount of hemp on the reed seat, because the reed needs to be seated well and that’s not going to happen if the reed is being moved up and down without adjusting the hemp. For the sake of eliminating variables, get the reed all the way in the reed seat. The hemp will control how far it goes in. Then adjust height to the drones.
Pipe bands are pipe bands, every person is different. You’ll quickly learn who under blows relative to you and who over blows. Easy reeds tend to tune sharper, harder reeds flatter. It’s all a juggling act. You’ll figure it out. Also, tuning up this way is less irritating to the drummers. Why? Well, there’s none of this band of solo meandering pipers looking for a place to tune their (relatively) out of tune pipes. You’re always playing as a band, be it warmup or full rehearsal.
Last Rules
Rule #1. Don’t touch it. The fastest way to piss off the PM is to admit that you moved your reed after he tuned you during the warmup. Your intentions are meaningless. Don’t touch it. Play it, but don’t touch it. The last thing any band wants is to have to go through the tuning process again at every rehearsal. That time consumption is a pain in the derrière. Like I said, ambient conditions will change your pitch. So don’t go fiddling with the reed to reacheive band pitch in your 60 degree house when you practice with the band on Sunday afternoons when it is 95 outside. It ain’t gonna happen. Just retune your drones and move on, maybe move some tape a micrometer, at most.
Rule #2. Same thing when the whole band gets together. You’ve replaced your cozy 73 degree church auditorium for the competition circle in the square in downtown Baghdad and it’s 120 degrees outside. Don’t go chasing after your band’s set reference pitch, because all you’re going to end up doing is retuning everybody’s chanters and wasting a lot of time and effort in the blazing heat in all your uniform.
Instead, do this. Warm the band up in the heat and try to set the drones about normal. First thing you notice is all the drones will be out of tune from last time. That is, the chanters won’t be in tune with the drones. So after the warm up tune all the way through, go around the circle measuring everyone’s low A, recalculate the reference pitch, then figure out if everybody is flat to reference pitch or sharp. If it’s colder than usual, you’re going to be flatter. If it’s hotter than usual, you’re going to be sharper. Once you’ve got the average of where everybody’s low A has moved to, go around again and retune all the drones to today’s reference pitch and THEN retune all the chanters.
Sometimes the weather has just funkified everything and you’ve got to move a few reeds. Maybe it’s really humid and everybody’s hard reed just turned to mush and they’re overblowing and you’ve got to pull the reeds out a bit. Hey, it happens. The point is, your reference pitch in your cozy band hall may always be 478, but on a chilly St. Patrick’s day parade morning, you’re going to be around 473 more likely just because the air is colder.
One last little personal note.
Don’t put your own tuning as a priority above everybody else. Even if you’re the guy going around tuning the band, you should never be responsible for tuning your own drones. Your drones should be tuned to the reference pitch just like everybody else’s, with a tuner, by somebody else, while you’re playing a tune. None of this finger gymnastics, tune-by-ear nonsense. You really do blow differently playing a tune than doing the tuning fingering gymnastics just like everybody else.
Also, your chanter isn’t the standard any more using this tuning method. That job has been moved to each person’s drones, because it just makes you look like an arse when you go around spending 10 seconds to tune each guy’s drones with a tuner and then you make everyone wait 15 minutes or more while you prepare like you’re about to go on stage at the Glenfiddich. Ideally, once you’re done going around the circle, hand the tuner off to some random guy in the circle, join the band in playing and have him tune your drones.
So everyone buys in to this technique, pick a new guy each time. You never know when you’ll need your non-standard pipe sergeant to do the dirty work. It might be the guy you have to cut on the day of competition. Sure would be nice if the guy not playing knew how to tune the band’s drones, wouldn’t it? Then you could focus on the playing and music and not the asynchronous hive of bumblebees that 8 sets of out -of-tune drones sound like.
Look, there’s no argument - the drones when tuned is the foundation of a pipe corps sound. They all have to be playing at the same pitch, so tune them with a tuner while the band is playing tunes, so the sound is the same when they’re playing the set for an audience. Forget the old style stopping off drones and playing scales to the PM’s master chanter. You’re going to blow different and you’re going to miss the balance of the chanter because you’re trying to analyze the chanter scale note by note instead of layering the average against the drones. I’m also gonna bet since you’re comparing chanter to chanter, you’ll just be tuning each person’s drones individually to their chanter, under the assumption their chanter is in tune. Nope! You’re going to get the horrid hive of bumblebees, because that’s what the untuned and drones will sound like. When two notes are played together and one is slightly sharp or flat against the other, the resulting acoustic phenomenon is called beating. This creates a horrible pulsing "wobble" or wave-like sound caused by the frequencies interfering with one another, and ruins the effect of massed pipes.
Some variations on a theme.
Some bands will have the standard piper play, then have another player start up next to them playing, and then the tuner guy will tune that person’s drones by ear to the standard’s drones. I guess this works too, but it can be very tough. I say just eliminate the variables and use the tuner. Buy a Blair or a Korg, those things work. Don’t need to plop down the dough for a fancy bagpipe tuner or microphone system or new-fangled app, and all the extra gear and gadgets when all you’re doing is looking for a little green light. That being said, I still use the tuner for individual notes when each guy is going around testing his chanter against the massed drones.
But again, we’re not playing scales. In going around, each player should be playing a tune. Drones don’t lie, and neither do tuners. Maybe the standard piper’s F is a teeny bit flat. No worries if you’re standard is the tuner. If some note sounds off have them play up to that note and hold it. Using tuner, tape and moving the reed, there’ll be no guess work whether the note is sharp or flat and you can fix it quick.
Another reason using a standard player’s pipes is a bad idea, you have to assume he is blowing the exact same for every guy in the band who is coming up one at a time. After 10 pipers playing the same boring old scale he’s not going to be blowing the same for the last guy as he did the first, the second time around. Each player’s own drones will not lie when tuned to the band standard, just make sure they’re in tune on the quick solo checks.
So, those are my thoughts. When I started as a PM of a grade 5 band, I tuned them like I tune my own pipes for solo performances - I first tuned myself, then I tuned their chanters to mine, and then their drones to them playing low A. I’m older, wiser, and vastly more experienced now, so I can freely admit that method was a big mistake. I’ve switched to tuning the band drones, dropped my ego and let somebody else tune my drones, and consistently we’ve got a solid drone sound on which to build a great chanter sound. It also helps teach pipers to listen to their drones and blow steady tone.
In massed band settings, one of the hardest things to do is play between two piers who have a different pitch than you, and if their drones are tuned to their chanters and not a standard, it’s even harder. You’re (subconsciously) always trying to blend in - underblowing or overblowing - so the sound quickly becomes unstable and ugly. Once you’ve got the band’s drones all set, there’s the foundation on which to base your ‘blowing tone’. If you’re finding you’re having to blow harder to get your chanter up to pitch to your drones, your chanter is flat, and the reed needs to go in. If you’re really having to back off, your chanter is sharp. You would never be able to tell if your drones are sharp or flat were they just tuned to your low A on an individual basis. Drones don’t lie.
April is a Special Month
April is a month filled with the sound of bagpipes! It's a great time to put on your kilt and play a tune or two on your pipes. Here's what's coming up this month:
All of April — Scottish-American Heritage Month honors the contributions and influence of Scottish immigrants to North America.
April 3-4 — B.C. Pipers' Association Annual Gathering — This two-day competition, also known as the "B.C. Indoor Meet," is one of the most important piping events of the year in Canada. The Friday features Solo Piobaireachd competitions and Open Drumming competitions, as well as drumming workshops. Saturday events are the remaining solo events, a full band competition, and the Ceilidh afterward including performances by the solo aggregate winners.
April 6 — National Tartan Day — This date marks the anniversary of the Declaration of Arbroath (1320), a document asserting Scotland's independence from England. It's a great day to don your family tartan.
April 25 — Anzac Day — A day of remembrance for the Australian and New Zealand Army Corps (ANZAC) who fought during World War I, particularly at the Gallipoli Campaign (1915). Many of those who fought were Scottish immigrants. Battling alongside Scottish regiments cemented the strong cultural connection. Anzac Day reinforces the important role of bagpipes as a symbol of honor and remembrance.
Whether you’re commemorating National Tartan Day or paying tribute on Anzac Day, it’s the perfect time to reflect on the lasting legacy of Scottish immigrants and their music.
--Jory Chisolm
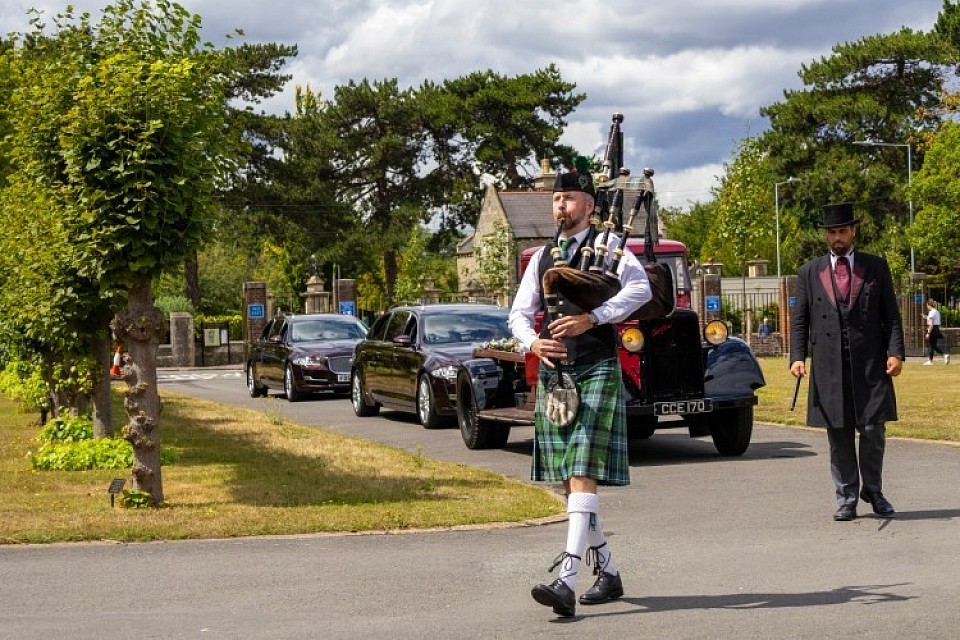
How to Help Clients Plan for a Piper at a Funeral
The Soulful Power of Bagpipes at Funerals
The Bagpipe in History
Have you ever been stopped mid-thought by the haunting sound of bagpipes at a funeral? In that moment, those pipes don’t just play music; they seem to breathe with us. The bagpipe’s iconic drones and chanter - the two main sources of its unique sound - create a continuous, blended, mournful melody that feels as if time itself is pausing. Then, you might wonder, 'Why would anyone choose such an ancient, (and frankly, loud) instrument for a moment of mourning?'
A bagpipe up close is, indeed, a very loud instrument, first adapted by the Romans as a military instrument, and brought to the European and Hebridean regions in the 300’s ACE. The Celts were both terrified and fascinated by the magical sound, and quickly absorbed it into their own music - a much louder instrument than the harp and the flute - then adapted and modified over the centuries, creating regional variations that still exist today in many European and countries.
The most well-known variant is the three drone, single chanter, Great Highland Bagpipe, adapted and designed to be played high in the hills and glens of Scotland. Its music likewise evolved to tell the news - a great battle victory celebrated, a wedding, a birth, a death, a tragedy. The music wafts on a steady hum of the drones, penetrating hollow and wood, to pass the news to all around that something important has occurred.
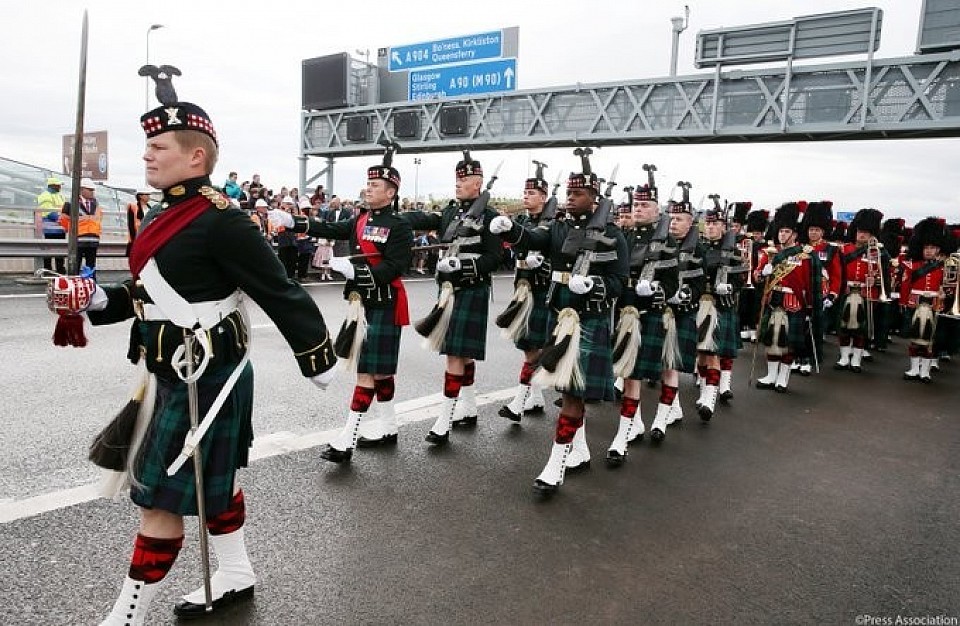
Following the Highland Uprisings and the wars with England from the 1220’s into the 19th century, leaders in the British Army realized that they had to divert the attention and fury of the Scots away from their trials and woes in the Scottish territories. Impressed by the raw power and courage of the Highlanders, they rapidly incorporated Scottish soldiers into their ranks, first as mercenaries, then as more formally established regiments to direct and ultimately funnel Scottish ferocity and tenacity into English aims of expansion and conquest.
In return for fighting for the Crown, the warlike Scots clansmen were granted the right to wearing the kilt, playing the pipes and highland dancing, creating a fertile but controlled ground for their culture to be preserved. In the 17th century, bands with pipes and drums became the means of motivating tired soldiers and moving them from one place to another. The howl of the pipes in war became the terrifying announcement that the ‘Ladies from Hell’ were about to attack, enhancing an already elite reputation, and securing the bagpipes as a martial instrument.
In garrison, the pipes were used to mark the Regiment’s daily activities - reveille, mess calls, assembly, parade and ceremonial events - dancing and dinners, even. As the British Army expanded the Empire in the 1700’s and later, ceremonial music with pipe and drum became the primary function of this ancient instrument, a usage that still exists today, in formats such as marches from barracks in full uniform to changing the Guard ceremonies to the Edinburgh Tattoo, a celebration of martial music that has become an enormous tourist draw and spectacle.
Pipes and Death
Here’s where tradition meets emotion. Like the iconic kilt and bonnet, you can see the bagpipes have threaded through Scottish identity for centuries, but their recurring role at funerals nowadays is about more than heritage. The pipes offer a sonic space - almost a ritual pause - for grief to be felt and respected. It’s quite simply a primal call to the blood. Imagine a single piper playing the mournful and beautiful dirge 'Flowers of the Forest' in the distance as family and friends gather. The music surrounds them, creates a threshold, signaling that what’s about to happen matters deeply.
But there’s a challenge, isn’t there? Sometimes words fail us especially when grief is raw. The steady, unbroken line of the bagpipe’s sound - that’s the bag’s air reservoir at work - steps in to carry our thoughts where language can’t. The result? Even a vast, unfamiliar space suddenly feels intimate, as if the music is holding everyone for just a while.
I have people ask me often, 'Isn’t it too much?' My answer is always: the right piece of music, played at the right moment in the right place, isn’t overwhelming. It’s transformative. It marks memory and gives shape to love where silence would otherwise stretch unbearably, sometimes painfully, long.
So if you’re planning a farewell, having the bagpipe played for the event by a good piper isn’t just a performance - it’s an invitation for the human heart to be heard, even when words fall short.
From Scottish Roots to Global Remembrance
When did the bagpipe become synonymous with farewells, especially in Scottish tradition? In Scotland, because of the community of the Clan system and the frequency of sudden death in battle or disease, funerals have always been more than a ritual - they’re communal acts of remembrance, gatherings to express grief and memories of family no longer present. Over time, the bagpipe became a central voice in these ceremonies, not just for its cultural weight, but for its practical power to cut through open air with a unique sound that expresses simple raw emotion.
Picture a rural kirk or a windswept graveyard. Bagpipes carry - literally. The phenomenon is called acoustic projection, a technical term meaning the instrument’s unique sound characteristics can fill vast spaces, outdoors or in. In military history, recall that the bagpipe quickly became a Scottish regimental tool, replacing the bugle as a way to communicate signals over the heat of battle, and in more quiet times, to summon the soldiers to sleep, to eat or to parade; and in more quiet times, honor the fallen with tunes like 'Flowers of the Forest.' This tune, a tribute to the men of Gael who fell battling the invading English, has been passed down for generations, and is still revered as a final farewell from Scottish pipers.
I’ve been asked “Isn’t this tradition stuck in the past?” Actually, no. Today, bagpipes are woven into remembrance ceremonies worldwide, from Canada to Australia, and even in France’s Somme, where French pipers keep the memory of World War I alive. St Patrick’s Day wouldn’t be the same without the bagpipes, nor would Remembrance Day or Veterans’ Day. The key term here is 'living tradition' - music that adapts, carrying meaning across time and place.
Someone asked, 'Does this resonate if you’re not Scottish?' The answer is yes. Look at the United States and our uniformed services. Police and Fire memorials. Parades. Graduations. Funerals. Bagpipes have become a universal symbol of tribute, celebration and communal mourning. That’s the evolution - heritage morphs into a shared human language.
So, when you hear a lone piper at a funeral anywhere on earth, you’re hearing not just a tune, but a centuries-old promise: that memory matters, grief is shared and honored, and no one says goodbye alone.
Choosing the Perfect Moment for Bagpipes in a Ceremony
Another question I’m frequently asked is 'If I want bagpipes at a funeral, when should they be played?' The answer is surprisingly flexible - but it should also be strategic. Let’s break this down. First, there is no real time a piper must play. Most families will choose specific points: as guests arrive, during the processional, just after a moving eulogy, at the final committal, or as a gentle recessional. Each placement has its own emotional impact for the family.
A better way of expressing this - Think of ceremony design as a kind of choreography - a flow that guides people through the reality of loss. The technical term used is 'ritual pacing': carefully timed transitions that hold space for both grief and reflection. Bagpipes can bookend a service, but sometimes, one well-placed tune bridging a reflective silence does more for the ceremony than multiple appearances.
Families often worry about 'doing it wrong.' What if the music feels too heavy, or simply too unfamiliar? My advice is simply to talk to your funeral director, your piper and your officiant. Let them guide you based on the setting to find the emotional tone you want. Remember, a reflection pause - where no one speaks and the music of the pipes fills the air - can be the most powerful moment of all.
A typical decision goes like this: 'Do we need more than one tune? If so, which one?' The answer to part one is yes, but not always. Simplicity often equals strength. Bagpipes aren’t about filling the air, but about marking the right moment. As for tunes, for example, I will use 'Amazing Grace' for comfort, ‘Hector the Hero’ or ‘The Dark Isle’ for reflection or 'Highland Cathedral', ‘Bells of Dunblane’ or ‘Flowers of the Forest’ (or any suitable slow air, really) for solemnity.
So, as you plan, ask yourself: What do we want people to remember? Then let the pipes help you shape that memory.
Blending Tradition with Modern Memorial Choices
Something that’s changing fast as a trend nowadays: the rise of cremation and modern non-burial memorials. Maybe you’re asking, 'Can bagpipes be part of a cremation service?' Absolutely. In fact, bagpipes are just as meaningful at memorials, crematoriums, or even at a wake as they are at a traditional graveside service. Remember, it’s all about the right pieces of music, played at the right moment, to mark memory and give shape to love where silence would otherwise stretch unbearably, sometimes painfully, long.
For families, the challenge is not just technical - 'Where do we keep ashes?' - but emotional: 'How do we create a moment of goodbye that feels real?' The pipes can bridge this gap. Picture a piper playing as the urn is carried in, or at a scattering ceremony by a lake. The music creates a ceremonial 'marker,' helping people cross the threshold of loss, even when there is no casket or burial.
Another common question - 'Isn’t that just for people?' Not at all. Pet memorials - yes, even those - can be graced by bagpipes. I have performed several of them. And modern options pair beautifully with the ancient sound of pipes, creating a ritual that feels both grounded and gentle.
So whether your ceremony is big or small, traditional or modern, bagpipes can help shape sadness and grief into something shared, witnessable and, ultimately, memorable.
Planning, Budgeting, and Finding the Right Piper
Let’s get practical for a moment. You’re considering bagpipes, but what about the logistics? First, there’s the matter of volume - the great Highland bagpipe is a powerful instrument, and its acoustic resonance can easily fill a church or outdoor space, often overwhelmingly so. That means that placement matters: a piper at the door can create atmosphere without overwhelming your guests. At a distance, maybe even playing and then walking away, so the sound diminishes. It’s what the family needs that works, and the piper is the expert at solving this. Ask him or her.
Now, money. You might be wondering, 'How much does this cost?' The honest answer is: it varies. Our piper fees depend on location, travel, and how many tunes you want. But here’s a pro tip: one thoughtfully chosen piece at the right moment can be just as moving - and more affordable - than a full set. Our fees start at $250 for a half hour set, with up to an hour travel each way included. The piper will be dressed in full regalia depending on the temperature and weather, and will play up to about six tunes when asked as part of the ceremony.
A family I spoke with recently was worried about 'getting it wrong.' But after a brief chat with their piper - covering timing, attire, and tune selection - their stress melted away. Communication is your best tool here. Ask: 'Have you played at funerals before? Can you help us pick a tune? Will you coordinate with our funeral director?' My pipers are experienced and professional, and will always help.
And don’t forget about expectations. Clarify number of tunes, procession details, and who will cue the piper on the day. These are logistical details, sure, but they’re also gifts to yourself - a way to set it and forget it, creating some calm in the midst of chaos.
In the end, hiring a piper isn’t just about music - it’s about steady support for your family’s hardest day. Plan thoughtfully, ask your questions, and you’ll find that the right notes can make all the difference.
Honoring Heritage While Creating Meaningful Goodbyes
How do you balance tradition and the realities of modern grief? It’s a big question, and one I hear often. The answer is: you don’t have to choose. You can honor the old ways - bagpipes, tartans, shared laments - while also embracing today’s options: cremation urns, keepsake jewelry, even pet memorials.
Let’s talk about emotional resonance and intentionality - two terms that really matter here. The music you choose, the vessel you select for ashes, the way you place memories in the home or on the water - all these are ways to give shape to love. Tradition isn’t a checklist. It’s an invitation.
But maybe you’re conflicted. 'What if not everyone in the family wants bagpipes?' or 'What if some guests find the sound too much?' Here’s where you get to personalize. Ask your piper to play outdoors, or choose some brief, gentle tunes. The goal of the music here isn’t to impress, but to create a genuine moment that reflects your loved one’s story.
Let me leave you with this: in the end, what matters the most is making that goodbye feel real—witnessed, marked, and loving. Whether you blend ancient with new, or lean deeply into tradition, your choices will write a story the heart of the family remembers.
So as you plan, remember: you’re not just organizing a ceremony. You’re shaping a memory, carrying heritage forward, and - most of all - offering comfort, both to yourself and to everyone gathered to say farewell.

Selection of Single Malt Scotches
How to Hold a Whisk(e)y Tasting and Not Just Because Burns Night is Coming ...
Whisky Tasting
It is no secret that every corner of Ireland and Britain holds claim to a storied past of spirits. If you look closely, however, you might notice a small nuance in the spelling of one particular amber-colored, malted drink that has been produced in the region for centuries.
So is it whisky or whiskey? Does it matter? Should you care? The answer is yes—to all of the above.
There are actually two explanations for where the distinction came from. One explanation suggests the singular ‘e’ is the result of a small translation difference between the Gaelic language that the word whisky comes from - uisce beatha in Irish, uisge-beatha in Scottish. Both mean "water of life"- a translation by monks in the Middle Ages of the Latin aqua vitae. That’s the nerd explanation.
Another suggestion appears more deliberate. In the 19th century, the Irish wanted to differentiate their product from the Scots, who after the advent of the Coffey still, at the time began making whiskies that were (cough, cough) not “up to the Irish standard” (and therefore referred to by the discriminati as “Scotch swill”, and by the drinking public as “benzene”) to supply a market that appeared insatiable. The 1800’s in Great Britain were not easy, and cheap booze flooded the streets with an inexpensive way to temporarily obliterate the world, a fact that enterprising merchants were eager to fill. Quality didn’t matter, and the great distilleries were severely hampered by their own rules, so the market was being filled with local product with little regard to quality. After two brutal World Wars and the unraveling of the Great Empire, Scottish whiskies once again began enforcing standards on all product, driving the home-made varieties out of business.
So now ‘whiskey’ is typically reserved for the Irish variety. (If you need help remembering the difference, I thought up a little trick. Make the e stand for Éire (the Irish-language name for Ireland), leaving the e-less whisky as the Scottish variety. )
If you are looking for a sample today, do not discriminate! The two countries both make a quality spirit. Both Scotch and Irish whiskey are typically made in a copper pot still and matured in oak casks for at least three years. The barley that Scotch uses is typically malted, while the barley in Irish whiskey is typically unmalted, and often combined with other grains. Whisky is usually distilled twice, while whiskey is typically tripled distilled, leading to a smoother mouth feel and a lighter flavor.
Scotch Whisky
Scotch Whisky is always spelled without the e. In order to be officially called Scotch whisky:
* The spirit needs to mature in oak for at least three years.
* Production and maturation must take place in Scotland.
* Single malt Scotch whisky must be made from 100% malted barley.
Japanese Whisky
Japanese whisky came into being in the 1920s. It was inspired by Scotch whisky – Scottish academic institutions trained the first whisky makers of Japan. This means that the process of making Japanese whisky is very similar to Scotch whisky production, however Japanese whisky has no legal minimal maturation period.
Most blended Japanese whiskies do use an amount of Scotch malt whisky in their composition – usually this is aged over five years old.
Irish Whiskey
Irish whiskey:
* Is always spelled with an e – this is a key difference between Irish whiskey and Scotch whisky.
* Uses little or no peat, so there is usually no smokiness in these whiskies.
* May contain a distillate of malt, a barley distillate and a portion of grain spirit.
* Is distilled three times.
Like Scotch whisky, Irish whiskey must be matured for a legal minimum of three years.
Indian Whisky
Indian whisky matures much faster and has bolder, fruitier notes due to India's hot climate and use of six-row barley, while Scotch matures more slowly, often developing complex, smoky, or floral profiles from two-row barley and peat smoke.
The key differences lie in climate, ingredients (six-row barley vs. two-row), maturation speed, and flavor profile, with Indian whisky often appearing older than its age statement suggests compared to Scotch.
Canadian Whisky
Canadian whisky stands out in the global spirits landscape, not just for its unique flavour profiles but also for its distinctive regulations. Historically, Canadian whisky regulations allowed distillers a broader canvas to experiment and innovate.
* Must be mashed, distilled, and aged in Canada.
* Aged in small wooden vessels for not less than three years.
* Contain no less than 40% alcohol by volume.
* May contain caramel and flavouring.
* Possess the aroma, taste, and character generally attributed to Canadian whisky.
Other whiskies from around the world
Bourbon
Bourbon is American whiskey that has been made from a minimum of 51% corn with rye and malted barley. Examples of bourbon include Jim Beam and Wild Turkey whiskey.
Bourbon is a very small area of Kentucky where bourbon were originally produced, but sadly since 1964 American law has stated bourbon can be made anywhere in the USA.
In Bourbon whiskey, the residue from the pot still is mixed with the mash to create a ‘sour mash’ whiskey.
Distillation of bourbon usually takes place in a column still and then a pot still, but sometimes only column stills are used – Woodford Reserve operate a triple distillation in pot stills.
Bourbon spirit is always matured in fresh oak casks, which are charred to yield more flavour.
Rye Whiskey
Rye whiskey is made in the same way as bourbon, but is made up of 51% rye. Examples of rye whiskey include Wild Turkey Rye and Jim Beam Rye.
Rye whiskies tend to be spicier in character.
Tennessee whiskey is made in the same way as bourbon, but it is charcoal mellowed before maturation
How to taste whisky
When presenting a whisky tasting, the presenter needs to pay close attention to the order of whiskies the guests will sample. I strongly recommend we start with the most delicate whiskies. We should save the heavy, smokey/peaty whiskies for the end, as not everyone will like these.
From each group in the blends, the presenter should pick several representative whiskies, preferably no more than FIVE different houses presented, or it overwhelms the palate.
The recommended order for blended and single malt tastings from the Whisky Society of Edinburgh is as follows:
Blended Scotch whiskies
Best ones are JW Black, Ballantine's, Chivas Regal, The Famous Grouse, and Dewar's, offering a mix of malt and grain whiskies for diverse flavor profiles from smooth and sweet to rich and smoky.
Other notable brands are William Lawson's, J&B Rare, Teacher's, and the blended malt Monkey Shoulder.
Blends are ALWAYS drunk with blends - NEVER with single malts.
From each group in the blends, the presenter should pick several representative whiskies, preferably no more than FIVE different houses presented, or it overwhelms the palate.
Single Malt Scotch Whiskies
G-H
E-F
A-B-C
I-J
From each group in the single malts, the presenter should pick one representative whisky, thus no more than FIVE different single malts presented, or it becomes hideously expensive.
Look to spend about $500 total.
Tickets for a tasting typically do not cover the price of the drinks, so don’t expect to make money.
Here’s the Cliff’s Notes for the above.
A – Full-bodied, sweet, pronounced sherry – with fruity, honey and spicy notes (e.g., Aberlour A’Bunadh, Auchentoshan Three Wood, Glenfiddich 15yo, Glendronach 12yo, Glenmorangie Lasanta)
B – Full-bodied, sweet, pronounced sherry – with fruity, floral and malty notes, some honey and spicy notes may be evident (e.g., Balvenie New Wood 17yo, Glenfarclas 10yo/15yo/17yo, Glengoyne 17yo/21yo, Penderyn Madeira)
C – Full-bodied, sweet, pronounced sherry – with fruity, floral, nutty, and spicy notes, some smoky notes may be evident (e.g., Aberlour 10yo, Glenfarclas 105/12yo/21yo/25yo/30yo, Glenmorangie Signet, Highland Park 18yo)
E – Medium-bodied, medium-sweet – with fruity, honey, malty and winey notes, some smoky and spicy notes may be evident (e.g., Auchentoshan 12yo/18yo, Dalmore 12yo, Glenrothes Select Reserve/Vintage 1989/1991/1992/1994, Old Pulteney, Redbreast 12yo)
F – Full-bodied, sweet and malty – with fruity, spicy, and smoky notes (e.g., Bunnahabhain 12yo, Deanston 12yo, Glen Garioch 10yo/12yo/15yo, Glenlivet French Oak 15yo, Tobermory 10yo)
G – Light-bodied, sweet, apéritif-style – with honey, floral, fruity and spicy notes, but rarely any smoky notes (BenRiach 12yo, Bruichladdich Laddie Classic, Glenfiddich 12yo, Glen Garioch Founder’s Reserve, Glenmorangie 10yo, Jura 10yo)
H – Very light-bodied, sweet, apéritif-style – with malty, fruity and floral notes (e.g., Auchentoshan Classic/10yo, Cardhu 12yo, Dalwhinnie 15yo, Glen Grant 10yo, Tamdhu 10yo)
I – Medium-bodied, medium-sweet, quite smoky – with some medicinal notes and spicy, fruity and nutty notes (e.g., Ardmore Traditional Cask, BenRiach Curiositas 10yo, Bowmore 12yo, Highland Park 12yo, Jura Superstition, Oban 14yo, Talisker 10yo).
J – Full-bodied, dry, very smoky, pungent – with medicinal notes and some spicy, malty and fruity notes (e.g., Ardbeg 10yo/Corryvreckan/Uigeadail, Lagavulin 16yo, Laphroaig 10yo/15yo/18yo/Quarter Cask, Toumintol Peaty Tang)
No, you're not mistaken. And yes, you read it right. There is no D group in this list. No, I don't know why - it's Scottish.
How to Taste
“Nosing” is an important part of the tasting experience. Encourage the guests to spend some time simply smelling the whiskies. Have them start with a light sniff around the outside of the still glass. Then get them to progressively stick their noses deeper into the glass, eventually while gently swirling the contents.
After a significant nosing period, it is time to move on to actual sampling of the whiskies.
When tasting each whisky, you should start at room tempaerature, and the spirit neat. Also, on the first sip I typically ask everyone to hold it in their mouth for several seconds before swallowing. I also encourage them not to even bother trying to assess flavour at this point. It’s important to cleanse the palate – and get past the initial burn. On subsequent sips, there will be time to explore flavours and aromas. Add several drops of water to the glass, and swirl. The serial dilution on the next taste (again, with drops of water at a time) is a fun chance to explore the flavours in more detail while reducing the pepper. Sip, and appreciate the changes in flavour. Dilute again, and retaste.
With all the discussions, nosings, water additions and subsequent re-tastings, etc., I would expect to spend a good hour going through 5-6 whiskies (maybe longer, depending on the crowd). Encourage an open discussion with all participants. This can sometimes require keeping the inevitable smarty-pants, know-it-all in check, to give everyone else a chance to comment.
I’ve done a number of these events with people who had little experience or interest in whiskies, and all have reported thoroughly enjoying the experience.
Some things to consider:
- Do we have enough tasting glasses, are we going to rinse them out in between (if they’re proper glass, we should!)
- do we have a pipette and water jug to allow people to add water (a drinking straw does the trick if no pipette)
- make sure there is plenty of water for people to cleanse palettes between whisky and allow 5-10 mins minimum between whiskies just to let people chat
- what whiskies are people bringing? To try to avoid duplication if it’s a BYO, I arrange the whisky in order they will taste, sticking to my Cliff’s Notes and the WSE recommended order. I'd go blends - bourbon cask whisky - sherry cask whisky - peated - peat monster - rocket fuel
- perhaps conceal each bottle until the tasting is done
- try to make it interactive so people can tell us what they think (if they are comfortable to)
- an easy way would be to keep scores and decide on their favorite, so if it's a regular tasting with the same group of people, keep a record of the scores.
Embellishments vs Music
We've talked in this blog about learning to play the Great Highland Bagpipe, and we've typically focused on learning the tune on the practice chanter, but what about when we're in band practice on our full set, learning the tunes? We know the music, now we have to coordinate breathing, squeezing, blowing and playing as we march, and still produce music. It's a significant change in pace.
So, we're up and playing the pipes, and we're honking out a rendition of Scotland the Brave. The pipe major has isolated us to the center of the band because we can't play the extras, and the music we're making is pretty plain and awful. Sound familiar? This whole scenario results from a teacher who cannot instil the basic premise of piping - accuracy and timing before speed, and learning to enjoy the music rather than loading the student with information all at once.
The Suzuki Method, or "Mother Tongue Approach," is a music education philosophy by Shinichi Suzuki emphasizing learning by ear first, like a language, repetition, positive reinforcement, and group classes, focusing on beautiful tone and gradual skill-building through graded repertoire rather than rote exercises. Students listen constantly, imitate, learn small steps, and later add music reading, building a strong foundation before complex notation. Instead of focusing on the forest, let's pick out one Christmas tree.
Embellishments - those twiddly bits in a bagpipe tune - are to the basic melody as Christmas ornaments are to our tree. They’re intended to enhance the beauty of the tune and to introduce an additional level of interest and excitement that is not otherwise present. We hang lights and ornaments on our tree to present it in a different, beautiful and more interesting way. These objects enhance the natural presentation of the tree. Now think of that same tree, with all this ornamentation in place, but the tree is dead, brown, with needles falling to the ground - think Charlie Brown's Christmas tree. Not so pretty anymore, is it? This is the case when pipers crash through a tune focused more on trying to do it all at speed that their fingers will not allow.
Because the bagpipe does not posess mechanical stops or valves to silence individual pipes instantly during play in the way a pipe organ or some other wind instruments do, the sound of the bagpipe is continuous and maintained by constant, steady air pressure (that's the theory, at least) from the bag. A piper cannot change the volume or turn off individual drones while playing a tune in a seamless manner, so to signal emotive changes in the melody, the piper adds embellishments.
Many pipers struggle to play notes precisely where they belong. They will learn enough of the tune to be dangerous, then tumble through the measure and produce something less faithful to the melody than what the written music states. Not only is this a disturbing distortion of the music, but it’s also a significant issue when playing with others. I am guilty of this myself, so I know of which I speak even as I attempt to self-correct. If the tree dies and the needles turn brown, even though the ornaments are still on the tree, it’s now something quite ugly. Pipers who try to fake through a tune at full speed crush embellishments, false-finger and miss entire note groups, and turn the tune into a howling disaster that ruins any musicality the tune might have.
When addressing these issues with individuals and with bands, I sometimes strip out more complicated embellishments and present something that I call “basic” music. It is a representation of the tune with the focus on the melody rather than on the embellishments.
Have a look at Scotland The Brave, one of the most requested and played bagpipe tunes worldwide. Played exactly as found in Scots Guards book 1, it’s a mitt-full with embellishments, from the fast, decorative grace notes (like grace-notes, doublings, throws, taorluaths) added to the basic melody which are crucial for rhythmic excitement and musicality, breaking up the continuous drone sound. It's challenging to play precisely in time, especially in massed bands where focus on the core melody and rhythm is key. Pipers use these "ornaments" to add flavor, often starting with simpler grace notes and progressing to complex ones like the taorluath.
I find that the vast majority of band pipers just destroy the melody, timing, and phrasing for the sake of adding ALL the embellishments. No. It's AWFUL. Accuracy and timing is essential here, so I force my students to play the tune S-L-O-W-L-Y and accurately. I will usually strip the tne down to the basic melody with simple gracenotes, then indicate where the beats fall within the tune as found within the “basic” version. By indicating where each beat falls, I help my student pipers to better understand and execute the basic timing and melody of the tune. As their competence and confidence grows, we’re able to reintroduce the more complicated embellishments slowly without distorting the melody.
Many will find this approach disagreeable, however I will defend this to a point. If someone has the ability, desire, and opportunity to play at a higher level, they should persevere to include all embellishments as written within a tune, playing it through extremely slowly and absolutely accurately until complete competence is achieved. On the other hand, if these elements (ability, desire, and opportunity) are not in place - such as getting the tune down for a parade or just for massed bands - I believe that it is entirely acceptable for a beginner to play the basic melody with only gracenotes or other simple embellishments. This allows the piper to focus on the sound that they are producing, timing, tempo, and phrasing, all of which may suffer otherwise.
There’s something else. Some who teach bagpipes hold onto the notion that unless you include all the embellishments, you’re a “hack”. I’m of another mind. Although I hate the word, I believe that if you compromise the sound, timing, tempo, and phrasing for the sake of pounding in complex embellishments, you’re a hack! I also believe that many students, young and old, crumble under these high expectations. Professor Suzuki knew this, and encouraged his students to focus on tune and tempo before complicating the thing, and his results proved astonishingly successful. Without experiencing success, our students will abandon the instrument in favor of less-onerous undertakings.
I maintain that if you can produce a pleasing sound on the instrument and play a melody without compromising timing, tempo, and phrasing, you’re doing the instrument justice and making music.
So to cap this off and seal my fate at the consummate bagpipe heretic, try starting your next student with a simplified version of a tune. Introduce embellishments gradually as the student’s competence grows. Focus on tempo, timing, and phrasing and hold those standards in place. I think you’ll find that not every student is destined for Grade 1; however, those who are will tackle embellishments with determination and fervor, but the vast majority of us, meaning those who aren’t (destined for Grade 1), can still make beautiful music.
The Highland Clearances
HORROR IN THE HIGHLANDS
The Highland Clearances of the 18th and 19th centuries were one of the most shameful episodes in Scottish history. Known as Fuadach nan Gàidheal in Scottish Gaelic (Gàidhlig), the ‘Expulsion of the Gael’ (ie Gaelic-speaking people), another term for the Highland Clearances, is arguably one of the greatest violations that Scotland every committed against itself. The rapid forced depopulation of the Highlands in the 18th and 19th centuries led to mass emigration and extensive damage to traditional Highland life.
The Highland Clearances were actually the continuation of an earlier and often forgotten action against Scotland’s agricultural communities, in the form of the Lowland Clearances. In the 17th century, Scotland was a predominantly agricultural nation. In the aftermath of the Union of the Crowns of 1603, when James VI of Scotland became James I of Britain, peace had descended on the troubled Borders area between the two countries, permitting the growth of a substantial industry in cattle and sheep farming. To help facilitate this, a series of land enclosures commenced to create larger farmsteads, which in turn led to the removal of many smallholdings.
Dispossessed subsistence farmers were forced to seek opportunities elsewhere, most notably emigrating to the nearby Irish province of Ulster from 1609 as part of the Plantation of Ulster. Although this enclosure programme gradually transformed the Lowlands, it would be the sheer pace and brutality of the Highland experience that would later provide such a stain on Scotland’s national conscience.
When Scotland and England politically united in 1707 to form the nation state of Britain, the Gaelic-speaking Highlands and Islands were still regarded as something of another land by Lowland Scotland, not least because it was deemed to be entrenched with Jacobitism. When the Jacobite rebellion led by Bonnie Prince Charlie was finally crushed at Culloden in April 1746, a huge road-building programme commenced to ensure the more rapid deployment of British troops to prevent possible future insurrections, while many clan territories were forfeited to the Crown.
The Highlanders were a clan-based people, their fealty given to chiefs from whom protection was sought in return. Under the 1746 Heritable Jurisdictions (Scotland) Act, many clan chiefs were stripped of their traditional rights, including the right to call their men to arms, but were allowed to continue to collect rents. In addition, the ‘Disarming Acts’ (not repealed until 1872) made it illegal for Highlanders to carry weapons, or to wear tartan or any aspects of Highland dress. The use of Gàidhlig was also discriminated against, with efforts taken to ‘civilise’ the region through the promotion of English in schools.
However, many Highland chiefs had already begun to consider themselves as lairds (landlords) prior to Culloden, with some having removed themselves to society life in Lowland cities and even to England. Their absentee lifestyles required money, and as demand for sheep increased across Britain they saw an opportunity for increased profits. Rents were raised on their estates, those unable to pay emigrated, while others were relocated to cities and coastal areas to seek alternative employment. Remaining inhabitants had no security of tenure, now being treated as ‘tenants’ rather than kinsmen within their ancestral settlements.
EVICTED TO CANADA
The first ‘improvement’ occurred on the Isle of Skye in the 1730s by the McLeod chief, and then at Balnagown in the 1760s under Admiral John Lockhart-Ross. In 1782, Marjory Grant, wife of Duncan MacDonnell, the 14th chief of the clan, leased land on the Glengarry Estate to a sheep farmer. Five hundred of her tenants were evicted and transported to Canada, joining hundreds who had already been forced to emigrate. Her son Alexander, as 15th chief from 1788, later continued the evictions.
In 1792, Caithness-based Sir John Sinclair of Ulbster, the MP responsible for creating the Old Statistical Account of Scotland, introduced the sturdy Cheviot breed of sheep to his Langwell Estate, hoping that it could help to transform the local economy for his tenantry. He was so successful that the British Wool Society began to offer sheep to any Highland laird at a cheap price. Sinclair was later horrified to see that far from benefiting the local tenants, his venture instead accelerated the rate of their evictions.
In Ross-shire in the same year, 400 inhabitants of Strathrusdale swore revenge after cows owned by members of the Ross clan were impounded, for having stepped onto a sheep way operated by two Cameron brothers from Lochaber. The cows were retrieved in a raid, followed by 200 farmers then driving 10,000 sheep from Easter Ross and Sutherland towards Beauly in Inverness-shire. Troops were dispatched from Fort George north-east of Inverness to seize the organisers, with five leaders arrested and convicted, although they escaped. The year 1792 is still known as Bliadhna nan Caorach, the ‘Year of the Sheep’.
SET ON FIRE
On the lands of the Duke of Sutherland, homes were torched on the authority of the estate managers or ‘factors’. Patrick Sellars became the most notorious of those who sought to drive Scots off their lands. He was a sheep farmer from Elgin, Morayshire, who worked as a factor for the Marquess of Stafford (later the 1st Duke of Sutherland) during the most aggressive evictions on the Sutherland Estate. After taking a lease for Culmaily Farm in 1811 with business partner William Young, he demonstrated new agricultural techniques, including land drainage, which yielded a huge growth in crops such as flax, potatoes, wheat and oats, but involved the eviction of 213 people.
Sellars and Young were soon appointed by Sutherland’s wife Lady Stafford as joint factors. From 1811 they evicted 15,000 “barbarous Highlanders” to facilitate sheep farms, prompting riots, with roofs of houses set alight to prevent their reoccupation. In June 1814 a bedridden Margaret Mackay had to be rescued from a flaming property, and died five days later. Sellars was tried for her culpable homicide (manslaughter), and arson, but was acquitted in 1816.
Sellars resigned in 1817, but the evictions escalated under his replacement. He remained as a sheep farmer on the Sutherland Estate at Strathnaver, and passed away in 1851.
Elsewhere, in islands such as Harris, huge kelp fisheries had been created by the end of the 18th century. When the industry collapsed, the land was cleared of tenants incapable of paying the high rents, and they were replaced with people who could. And 30 families in Scarista were cleared to make way for a sheep farm in 1828. These expulsions continued throughout the terrible famine of the 1840s, and in some places as late as the 1870s.
The Church of Scotland, as the state church, was later condemned by many victims. John McLeod, a witness to the Strathnaver Clearances in 1814, later stated of the ministers that “the oppressors always appealed to them for sanction and justification, and were not disappointed”. On 24 May 1845, 88 people within 18 families were forcibly cleared from Glencalvie in Easter Ross, accepting their desperate situation as God’s will. With nowhere else to go they sheltered in the yard of nearby Croick Kirk, refusing to enter the building out of respect.
Despite prominent campaigns by both The Times and Free Church of Scotland ministers within The Scotsman, the eviction was not repealed. If you visit the kirk today, graffiti scratched by the tenants into the glass of the windows can still be read, including the words “Glencalvie the wicked generation”.
Many of the dispossessed sought to carve out a living as crofters on poor soil lots in coastal communities. By the 1880s rent strikes commenced and land raids began to be enacted to reclaim traditional lands by way of retaliation. A royal commission chaired by Lord Francis Napier was set up to address the crofters’ grievances in 1883, and recorded the testimonies of thousands of Highlands and Islands folk. The resulting first Crofters Holdings (Scotland) Act was passed in 1886, finally granting some security of tenure for the much-diminished population, putting a final end to the Clearances.

Halloween Pipe Band
The A-B-C's of Piping
ABC of piping
It's been a while since I posted a blog entry, and it's not because we have been lazy - October alone saw us playing every weekend almost, members traveled to far destinations and were unable to attend practice, and new pipers were introduced to new instructors. (Thanks, Quinn!) But learning on a practice chanter means eventually transferring to the big pipes, and that means a whole new series of challenges need to be met. The bagpipe is not an instrument that lends itself to simplicity, so here I offer an opinion on how to make your pipes EASIER TO ACTUALLY PLAY.
You might have heard the phrase. “It’s as simple as ABC.” But what, exactly, does that mean for a piper? Simply, ABC stands for A - airtight, B - blowing, and C - comfort. Let’s face it. Playing the bagpipe is hard enough without struggling with a poorly set up and badly balanced instrument. There are three primary reasons why bagpipes may feel uncomfortable or inefficient:
1. Your pipes are too hard. This is usually an issue with the chanter reed because the pressure required to keep the chanter reed going is too high.
2. Your pipes are taking too much air. This is usually caused by a leak somewhere (hemped joints, pipe bag, or blow pipe valve) or by incorrectly adjusted drone reeds which allow too much air to flow through. (I've addressed this in a previous post. Go find it.)
3. Your pipes don’t fit you properly. This is caused by a pipe bag size and shape that is wrong for your body, or a blowpipe that is too long or too short.
First, let’s look at A for AIRTIGHT, because air efficiency directly affects the other two.
Air inefficiency in the bagpipes has two issues - too much air coming out, or not enough air going in.
Beginners pipers understand that not enough air going in can be a problem, until they build their strength and stamina up. Part of the problem can be the chanter reed hardness or the bore of the blowstick.
The best way to determine whether your chanter reed is too hard or if your pipes are taking too much air is to use a pressure gauge — it is honestly the best tool to learn how to blow with steadiness, but it also gives you an exact measurement of how hard your pipes are. Most pipers play comfortably with a great sound in the range 25-35 mm H2O on a bagpipe gauge. If you use the gauge and find the pressure required to keep your chanter sound going is higher than 35, you should adjust the hardness of your reed - quickly, before you blow a vessel - or get a new easier chanter reed to lower the pressure required.
If the chanter reed pressure is not the problem, getting air in might be, and that might be because the blowstick isn’t the correct size or bore. A blowpipe of proper length should allow you to play your pipes with proper ergonomics, keeping your body in a normal, comfortable position. How many times have you seen a piper who has to twist their neck or turn their head away from their pipes just to reach the blowpipe? Or perhaps you’ve seen the piper who has to stretch their hands down to try and reach the chanter? Too many sets of pipes come from the maker with blowpipes that are too long, but this can easily be solved with a shorter blowpipe.
You can buy adjustable blowpipes which are perfect for finding the exact length for your needs. The right length of blowpipe will allow you to keep your body in a neutral position, with your head, shoulders, and arms as if you were just standing naturally. Watch yourself playing in the mirror or on video, and consider whether adjusting your blowpipe length might make your pipes more comfortable to play. Borrow a shorter blowpipe from a friend to see if it feels better.
Some blowpipes, especially the older ones, have a very narrow inside bore. Try blowing through the blowpipe on its own. Is it free-flowing or is there significant restriction? A narrow bore makes it harder to blow air into your pipes and makes your pipes harder to play. Consider a new blowpipe or take yours to a pipe maker who can drill it out to a wider bore.
If you’ve done these checks and you’re still having issues keeping the drones going and the chanter sounding, the pipes themselves may be taking too much air. When this is the issue, it feels like you can’t keep the bag filled. The air simply escapes from the instrument faster than you can keep up with. This is usually caused by an air leak somewhere or drone reeds that need to be adjusted or replaced.
First, the pipe bag can leak. And a leaky bag means air that is not being used to vibrate the reed, so you are working harder to play your pipes. You want, no, you absolutely NEED, your bag to be air tight. You can check this by plugging off the drone and chanter stocks with stock stoppers. You then blow through your blowpipe inflating the bag to full. It’ll look like a toddler’s idea of a horse, but hey, beauty is in the eye of the beholder. Assuming your blowpipe isn’t leaking, the bag should stay inflated for several minutes. If it doesn’t, you have a leak. First, check all the stoppers are in correctly, and reinflate. Next, check the blowpipe itself for leaks.
If you can’t hear a leak coming through the blowpipe (valve, cracks, loose joint) then you must check the bag for an air leak. The quickest way is to pretend your bag is a bike tire tube – submerge the freshly inflated thing in a tub of water and see where the water bubbles are coming from.
If the stitched seams are leaking, buy a new bag. In the meantime, you might try a temporary seal with a wood glue. If the stock inserts are leaking, you will need to re-tie or retape your stocks. You might get away with using some electrician’s tape around the joints/stocks as a stop-gap fix (i.e. on the competition field) but trust me, neither of these repairs are a long term fix. If you have an old-school hide or leather bag and small bubbles are forming all over the surface, a good seasoning will probably fix the problem. Unfortunately if a synthetic bag is leaking all over, you likely need to replace it. No bag lasts forever.
You’ll also need to check your stocks for cracks. You’ll see this from bubbles rising from the body of the stock when the goose is inflated and immersed. If they are and the crack goes right through, it will leak like crazy. Fortunately a tiny bit of carpenters glue will fix the problem. Put a dab of glue on the inside of the stock with a long q-tip, and apply a vacuum suction on the outside so the glue is forced into the crack.
The pipes are one of the few instruments where you actually use your teeth to maintain position. You’ve likely felt tightness in your jaw or soreness in your teeth after playing — I strongly recommend upgrading your ergonomics and comfort with a high quality mouthpiece protector for additional comfort — this can be as simple as a piece of rubber tubing that fits over the mouthpiece and softens the bite all the way up to special fittings for the top of the blowstick that open the bore and protect the teeth. Ask other pipers what they use. You’ll get a bewildering amount of information. I like the Airstream adjustable blowsticks, myself.
In summary, here is how you make your pipes easy to play.
Airtight
Air leaks from joints. Add hemp until the joint is firm but not tight. Joints need to be tight enough you need two hands to move them. The exception here is the tuning joints, which should be moveable using two fingers. Wrap tuning joints with Teflon tape to make these easy to screw up and down.
Blowing
Keep a steady pressure on the bag. Blow the elbow off the bag, rather than relying on the breath to maintain the chanter. If it’s still not working, check the joints in the drones for leaks.
Comfort
Choose a reed that works for you. Eyeball busters do not make pipers sound better. Find the sweet spot in the chanter where the high and low A sound equal, then tune your drones to them. Tape only when necessary.
Choose a blowstick length and bore that fits you.
Finally, choose a bag appropriate to your size and comfort level.
Finally, Tuning
Play Low A then play a tune while listening to the drones. Shut the drones off, and tune the outer tenor to the chanter, then the middle drone to outer, then the base drone last of all.
The Bagpipe Chanter Reed Workshop
Chanter Reeds
A good chanter reed is hard to find, and the process can get pretty expensive. Most bagpipe players spend the better part of their time searching through a box of reeds and trying out each one to find the best ones on offer. If you’ve played through a box of reeds and have separated the few good from the obviously bad, and now have bought your good reeds, you may be wondering if there’s anything you can do to extend the life of your good reeds. From storage techniques to proper maintenance, below you’ll find some tips that will help make your reeds last longer. Regardless of the instrument in question, all reeds should be first and foremost handled with care to prevent damage.
Preparing the Reed
Before you play any reed, you must first moisten it. Most musicians wet their reeds in their mouths, while a few wet their reeds in a small cup of warm water for a few seconds. Never ever soak a reed, because a saturated reed cannot vibrate correctly, and the chance for it to mold goes up dramatically. It doesn't take much, but moistening your reed before playing is crucial: cane is an organic product which naturally holds water. Wetting the reed allows water to fill the interior of the numerous hollow tubes spreading across both ends of the reed, filling them and allowing flexibility while vibrating hundreds to thousands of times per second. Lick the reed to moisten it. Reed makers recommend blowing through the reed a few times - silently - because the moisture in your breath is usually enough to wet the reed, but that takes several minutes to ensure the reed is saturated, so most players simply moisten it with a quick lick both sides before placing the reed in the reed seat of their chanter. Once the reed is moist, gently screw the reed into the reed seat from the top. Be careful not to over or under-tighten; the reed should feel snug in your fingers, but not too tense, and the high A and low A should be exactly an octave apart.
Clean Mouths = Clean Instruments
If you use your spit to moisten your reeds, and you worry about hygiene, consider rinsing your mouth with mouthwash or brushing your teeth before you do so. In a few cases, the bacteria from your mouth can accumulate on the reed causing mold formation, so it’s best to avoid any possibility of contamination. If you’re concerned about maintaining the cleanliness of your instrument, use a cup of clean water to moisten your reeds, instead. If this isn’t a possibility or if you prefer to moisten them with your mouth, speak with your band teacher about how often you should be disassembling your instrument for a deep clean. It’s recommended that in all cases you should clean and disassemble your instrument monthly to check reed condition, check hemp and ensure joints are airtight, as well as adding bore oil and new hemp during its annual maintenance. You may need to do this more or less depending on how often you use your instrument.
Mold
We’ve all done it. Left our chanter in the pipes after a grueling gig and never got around to pulling the chanter out of the stock. It’s now a week later, and you pull the chanter to find a small, fuzzy, grey garden covering your reed. It’s mold. Mold will destroy a reed because the mycelia (mold roots) secrete enzymes that break down the cellulose in the cane. A microscopic fungus, mold thrives in warm, damp, and humid environments with organic material, such as a bagpipe chanter stock. It can grow on many surfaces, including fabric, wood, glass, and plastic, and may appear as black stains, specks, or grey furry growth. Mold growth is influenced by moisture, temperature, substrate type, and exposure time.
Airing out and drying off the reed thoroughly after playing, using a reed cap and generally keeping moisture away from the reed will prevent mold from getting established, which is essential in keeping a good reed alive. I have actually salvaged reeds that had mold on them by removing them from the chanter, wiping them off with tissue paper dampened with plain water, and then setting them on tissue paper to dry out. They look spotted and stained, but I can still play them. I just have to remember not to put them in my mouth to moisten the reed …
You will hear of stories where the piper has soaked the reed in Listerine, Dawn, alcohol, whisky, and innumerable other folk concoctions. The chemicals in those products all digest cellulose, the matrix our cane reed is made of. Essentially, you’ve just taken a damaged reed and subjected it to more assault - and shortened the life of your reed to boot. Contrary to popular belief, saliva does not break down reeds, because it's biochemically unable to. Saliva has enzymes in it which assists our gut in processing complex proteins and sugars, but not enough to damage a mainly cellulose and fiber reed. If there is mold on the reed, simple cleaning with moist tissue and drying in air is all you need to do, however, understand a moldy reed is damaged, and won’t last. Keep a new reed as backup.
Playing the Reed
Once you have done all the “crowing” blowing tests (and your maddened spouse has left the building), put the reed into the chanter, moisten it, and play for a bit. You'll want to make sure that your pipes are adequately warmed up (typically, 10-15 minutes) and you are "blowing steady". If your drones are wavering due to uneven blowing pressure, you'll be trying to tune your chanter to a moving target which will be very difficult. (If you are not sure if you are blowing steady, record yourself and listen - it'll be pretty obvious.)
Here’s how pitch works: The length of the air column, from the reed to the end of the drone, determines the pitch. The longer the air column, the lower the pitch. The same principle applies to the chanter. Think of the open hole as the end of the chanter. The distance from the reed to the top of the open hole determines the pitch. When you cover part of the top of the hole, the air travels further, lowering the pitch.
Here is how tape works: If you put a little bit of tape at the top of the hole, it effectively lowers the top of the hole, lengthening the distance the air needs to travel, and therefore makes that note a little bit lower in pitch—flatter. We use tape to adjust a note that is too sharp (too high in pitch) and make it flatter or lower in pitch. It works really well and allows pipers to get precision control of the tuning of every note on the chanter.
Now, play Low “A”, then high “A”. If the High “A” sounds sharp, or higher than the low “A”, you need to lengthen the distance between the reed so the top of the holes will lower their pitch. If your reed pitch is too sharp, you must move the reed upwards by gently rotating it and easing it up in the reed seat. If the reed comes out, add more hemp to the base of the staple until it fits firmly and at the height needed to flatten the high hand.
If the high “A” sounds flat, shorten the distance between the reed and the top of the holes to raise the pitch. If your reed pitch is too flat, you must move the reed downward by twisting the reed in the reed seat to move it further in. This may require you to remove hemp from the base until it can seat firmly and correctly. More on tuning your reed in a bit.
Remember, you can always tape the top of the finger hole of a sharp note to flatten it, but taping the bottom to sharpen it rarely works. Move the reed in/down in the reed seat.
Modifying Reeds
Why would someone alter a chanter reed? Maybe it requires the wrong pressure or it doesn't sound right. Almost all manipulations are made on new reeds. If a new reed is a "gut buster" ( too hard to play right now) there's a few things you can do.
Play it until it softens up. This can take weeks, but is the safest method and leaves you with the strongest reed. Just plug up the drones and play it as long as you can, it may only be five or ten minutes. Over a week or two, when comfortable, add a drone until you have your full set going. If after a few weeks it's stopped getting easier to play and it's still too hard, then think about taking a more proactive step.
Hydrate the reed some more. Dip it in water for a second or two, blow through it for several slow breaths, or lick it gently, then shake it out and dry it off, then play it. New reeds are usually pretty dry and need moisture. Don't ever soak a reed, it can warp. You can repeat this, but less dramatic hydration is better. Store the reed in a reed cap to keep it from drying out too much, or ideally, use a humidor type cap to help regulate humidity.
Pinch it with your fingers. This will temporarily ease a reed (and raise its pitch). Try to keep pinching to the top third of the reed for a count of 60, then try it out. If you squeeze too low and too hard you will collapse the sound box and destroy the reed. You can repeat pinching, but again less is better. If you overdo it, a mandrel or reed poker may help open the reed back up. Shepard make a gadget that will do the pinching for you. It’s inexpensive, and it does seem to work.
Install a rubber band bridle. Slide an orthodontics rubber band wrapped a few times over the staple up past the lacquered hemping to a point about 1/5 of the way up the exposed cane of the reed to create a bridle. If this makes it too easy, slide it down a bit. If it's still too hard, move the bridle up a bit - too high though, and the top hand will sound a little thin. After a few weeks to months and the reed eases, this bridle may be removed or gradually worked down the reed as time goes on. If you wrap the rubber band very tight or the reed is weak or you just want to be safe, it'll be best to only slide the bridle up during playing sessions, and to lower it back to the supported staple area after.
Pinch the staple with pliers. This is way more drastic and usually unnecessary. Needle-nose pliers either well wrapped in tape or covered with leather works well. If you squeeze too hard, but haven't damaged the blades, you can open the staple back up with a mandrel or a reed poker.
Sand/Scrape it. This is irreversible. Removing part of the cane from the reed can not only reduce required pressure, but may also have the unintended side-effect of altering the pitch and "crow" of a reed. Dangerous "red zone" areas that typically affect sound also are: the top strip of the reed, the sound box, and the area down the center of the blades. Where you scrape depends some on the type and make of reed. A very drastic step is to carve notches at both edges of the reed a bit above the hemp line - only if you really have to, such as "the parade is tomorrow!" On a ridge cut reed, you can scrape/sand down a bit on the pronouced ridge itself. Never take a brand new reed and scrape it down to your usual comfortable blowing pressure. Always leave "room" for the reed to weaken. If you start at soft, it'll turn to mush later.
Trim it. Only do this IF YOU ARE CERTAIN THE REED IS WORTH SACRIFICING, and you know what you are doing. This is 100% irreversible. Cutting the vibrating edge off will definitely sharpen the reed. However, not only does this reduce required pressure and sharpen the pitch, but it can also have the unintended side-effect of changing the sound of a reed, making it harsher and shriller on the high hand. I would use this as a last-ditch effort only. The cut must be tiny, accurate, perpendicular to the reed body, and done with a razor blade to preserve the edge where the sound comes from. If you have some moldy, chipped or blown-out reeds, experiment with these first, before attempting to attack a good reed that cannot be sharpened any other way.
Change your chanter. Sometimes, for any reason (and sometimes none at all) a reed just will not tune in your chanter that day. If you have taped every hole you have and your chanter is beginning to look like a ragged maypole, maybe it’s not the reed. Take it out, and put it in another chanter, then try tuning it in that one instead. Often, this happens when you absolutely have to sound your best, and it’s an aggravation you just don’t need. I carry two poly chanters - one is the squawker chanter that came with my poly Gibson knock-offs, the other is a G1 Platinum Poly Pipe Chanter which seems to pitch about 5 cents higher in my pipes. In my 80 year old blackwood Lawries, however, I play a Gibson poly chanter, but I carry a plain Chris Apps rosewood and an RJM (Roddy MacLeod) solo blackwood with a silver sole for really special events. In the Lawries, all of them seem to pitch within 2 cents of each other, and I have tape only on the Apps chanter for the F and G holes.
Bottom line, it’s not always the reed.
Reed Death
So how to you know if a reed is dying? It will tell you. A "blown out" reed will begin to behave erratically: notes will be right one moment and way off the next, a G gracenote might honk before correcting, or the transition from high hand to low hand will make the reed wail and screech, or the lower hand will double tone, or … you get the drift. To quote the movie Ghostbusters: "Cats and dogs living together - mass hysteria!" It may be hardly noticeable at first. A note that acts weird every few days or simply after playing a long time. A reed that doesn’t perform or changes pitch on you when the event is in the heat. Or, the reed gets easier and easier until it no longer plays in tune despite repositioning and taping. Gradually it just gets worse until you have to replace it. Edges get bent or split. The blades themselves look wrinkled. There’s thick mold growing on the reed. The split in the cane goes from the lip to the staple. Time to throw it away.
Remove Moisture
Once you’re finished playing, it’s important to remove any excess moisture around your reed. (See Mold above) You can do this by completely removing the chanter from the stock, wiping the reed dry with a tissue, and storing it under a reed cap to dry out. Whatever you do, don’t take your reeds out and keep them in a sealed plastic bag. Over time, this can actually induce mold and mildew to form. Plus, prolonged soaking without allowing natural evaporation will make the reed too porous, changing its vibration characteristics and shortening its life. Fluctuation in moisture, humidity, and temperature greatly affect how your reed plays, which is why reed humidifier caps have become so popular. It’s just my opinion but I believe these expensive humidors only prolong reed life for a few extra weeks at most, with the only advantage being that a reed stored under a humidor cap might actually be ready to play several minutes before a licked reed is. If it works for you, though, go for it - there's a reason many top players swear by them. The more you become familiar with your reeds, the more you’ll become aware of how these changes affect your reed’s performance.
Store Them Properly
Storing your new chanter reeds in a proper reed case keeps them flat as they dry, which prevents warping. Additionally, it’ll keep your reeds from being damaged as you transport them to and from practice in your instrument case. Many pipers assume that storing reeds in the clear plastic cases they’re packaged in will suffice, but those cases don’t actually keep them flat, they just keep them from chipping during shipping. A quality reed case can also prevent accidental chips since pipers can more easily slide the reeds into place. A small reed case typically holds four reeds and are usually available for $20 or less. If you’re concerned about the price, think about the case as an investment: it’ll quickly pay for itself in the money you’ll save on purchasing replacement reeds.
Cap the Chanter
This is the first thing you should ALWAYS do after playing. You remove the chanter from the wet environment of the stock, dry the reed off using some tissue, and then isolate it in a reed protection cap with a vent hole. Be very careful as chipping or knocking the reed against the stock or cap will ruin the reed. Check the chanter bore for any moisture that has run down from the reed. If it's wet, you can use a small brush to carefully wick the moisture away. Use this opportunity to replace any tape on the chanter that appears slippery.
One might think that it would be advantageous to keep the reed very moist - eliminate one variable, so to speak - by leaving the chanter attached to the bagpipe bag. However, moisture is a catalyst for mold growth. Mold breaks down a reed and will greatly reduce its life span. A moldy reed is a damaged reed, and replacing it before its time becomes expensive. Consequently, most pipers remove their chanters from the bag after playing as they pack their pipes away, and use a "reed cap" (sometimes called a "chanter cap" or "dry stock") to protect the reed while it is seated in the chanter.
Some find that a chanter reed cap with a built-in moisture stabilization system will keep their chanter reed "just right" and ready to go. One reed maker that I know swears that it's the cycle of drying out then rehydrating that shortens a reed's lifespan. I have no good reason to dispute that. A specialized cap should help keep a reed's moisture content more stable. Some very experienced pipers say that the humidor caps are a solution in search of a problem, and that such a cap makes little noticeable difference to them. As with most things with piping, there are claims either way.
Rotate Your Reeds
Playing the same reed day after day will wear it out quickly, so it’s important to consistently rotate your reeds. Many experts recommend playing a different reed every day to give the others a break. If you’re using a brand new reed, it should only be played for about five minutes a day during the first week. In most cases, the new reed has been bone dry for at least a year or two before you purchased it, and this 5 minute breaking in process slows down the warping process and allows for more complete rehydration and stabilization. Always have several reeds in top playing condition in your rotation. Avoid playing any reed longer than 30 minutes in a practice session, or longer than 60 minutes in a rehearsal or performance. Playing any reed for prolonged intervals wears it out, and the longer you play a reed in any single session the faster the reed breaks down; therefore, shorter periods of playing with reed rotation are ideal.
Above All, Be Patient
Reeds have a well-deserved reputation for being difficult, finicky, and a pain to deal with. Unfortunately, it’s just something that we as musicians have to learn to deal with. If a reed warps or chips, don’t stress out and do your best to manage your patience. Just because a reed is warped doesn’t mean you have to throw it out. Simply moisten it daily and let it try out on a flat surface. Over time, you may notice that it’ll straighten itself out. A chipped or torn reed, though, is toast. Replace it as soon as possible, because it will only get worse. Following the above reed care tips will save you time, money, and frustration. If you find that they work for you, share the knowledge with your friends and bandmates, and let us know what they think.
Free Workshop - Learn bagpiping, drumming, and dancing from master teachers!
The weekend workshop today was absolutely the best. A hugely productive but exhausting day. What a blast. Information overload but thank you to Matt Beall and all his instructors, especially James and the Steves - a brilliant choice for all who participated - was passed by P/M Muzzy and all of those from SJP who attended. Frank Hollifield worked on marching as a band and was amazing. Great instruction and camaraderie with pipers of all levels from three states in one place, learning for free. Just what I needed as a kick in the arse for my piping, personally, but thats can be said of all of us who attended. Couldn't stay awake for the ceilidh so headed home early. I have so much music to work on and so little time ...
Once again, Matt pulled off another brilliant teaching event, and I am so very grateful and appreciative of him and his family for doing this. Please do not stop. Our collective Thank you was also passed to his lovely wife as well - without her, as with mine, we wouldn't be able to play our bloody temperamental and utterly endearing instrument, let alone meet in massed numbers to make us all better.
If you missed it, you really missed something. He'll have another event in February I am assured. I plan to be there.
The Hub City Highlanders HCH Workshop is a FREE one-day workshop for pipers, drummers, drum majors, and highland dancers. Teaching level is absolute beginner through first competition. It is held twice a year on the first Saturday in February and August at the University of Southern Mississippi in Hattiesburg MS. The last workshop was the HCH Fall Workshop on Saturday August 2nd.
Each skill level had an instructor for their level of play as well as group classes. Topics included (but weren't limited to) learning a bagpipe tune, maintenance of your bagpipe, tuning, wearing the uniform, intro to piobaireachd, preparing for solo competition, etc. Participants played for the class as well as have their ears trained by listening to others. For those already competing, the workshop provided upper grade challenges that included expression/technique and upper grade tunes. We also formed up outside for marching exercises and taking commands from the drum major then most went back inside for the ceilidh!
HCH Workshop is a group of volunteers determined to properly teach the Scottish traditions of bagpiping, drumming, and dancing. Classrooms we used were in the Music Department of the USM campus in Hattiesburg MS.
Check-in started at 8:30am with classes starting at 9am sharp. Parking was free, helped by the placement of multiple blue arrows.
All in all, it was a really worthwhile and educating day.
https://hchworkshop.com/
What is Piobaireachd?
This is a reprint of the inaugural blog post I authored for the site, with contributions from P/M Bill Muzzy.
What exactly is Piobaireachd?
Piobaireachd (pronounced “pea-brock”) is regarded as the classical music of the Great Highland Bagpipe. It is also known as Ceol Mòr, meaning “Great Music.” This genre is distinctly different from Ceol Beag (“Little Music”), which encompasses marches, slow airs, and various dance tunes such as jigs, reels, strathspeys, and hornpipes. While some piping purists (not pointing fingers at Doc, of course) refer to piobaireachd as “the brose and butter,” and Ceol Beag as “bluidy fireworks,” most enthusiasts appreciate the intricate beauty and detail found in both styles.
Piobaireachd compositions date back several centuries, with origins tracing as far back as the 1400s. What distinguishes piobaireachd from other Celtic music is its traditional performance as a solo on the Great Highland Bagpipe.
We believe every dedicated piper should learn at least one piobaireachd. Recommended beginner pieces include Glengarry’s Lament, Macintosh’s Banner, The Company's Lament, and Massacre at Glencoe. Several St. John’s Pipers are currently studying these for their personal development. Piobaireachd demands strong memory, precision, and musical expression—skills that significantly enhance performance in lighter music as well.
Piobaireachd tunes are generally longer than light music and are structured around a central theme known as the Ground or Urlar, followed by multiple variations that get steadily more complex as they are played. These variations reinterpret the main melody with diverse rhythms and technical embellishments. Common variations include taorluath, crunluath, and occasionally the formidable crunluath-a-mach—among the most challenging and advanced techniques in piping. Piobaireachd is typically based on a pentatonic scale, reputed to resonate beautifully across the Scottish valleys. It is crafted to be appreciated both from a distance and in close proximity.
Due to its rich heritage, piobaireachd tunes often commemorate specific individuals, clans, or historic events. Notable titles include Too Long in this Condition, The Piper’s Warning to his Master, The Lament for the Children, Beloved Scotland, and The Little Spree. More contemporary compositions like Beloved Scotland even have band arrangements. Observing master pipers perform these pieces (YouTube offers an excellent resource) vividly demonstrates the bagpipe’s remarkable expressive and emotional range in expert hands—sure to inspire greater precision and artistry in your own playing.
Many pipers regard Piobaireachd as the pinnacle of bagpipe music—both the most fulfilling and the most demanding to master. Prestigious piping competitions, such as the Gold Medals at Inverness and Oban, are awarded to performers who excel in Piobaireachd alongside traditional marches, reels, and strathspeys.
Ultimately, Piobaireachd enables the piper to profoundly connect with the audience’s soul. No listener remains indifferent to a well-executed Piobaireachd—you either embrace it or you do not. Such is the nature of the instrument we cherish.
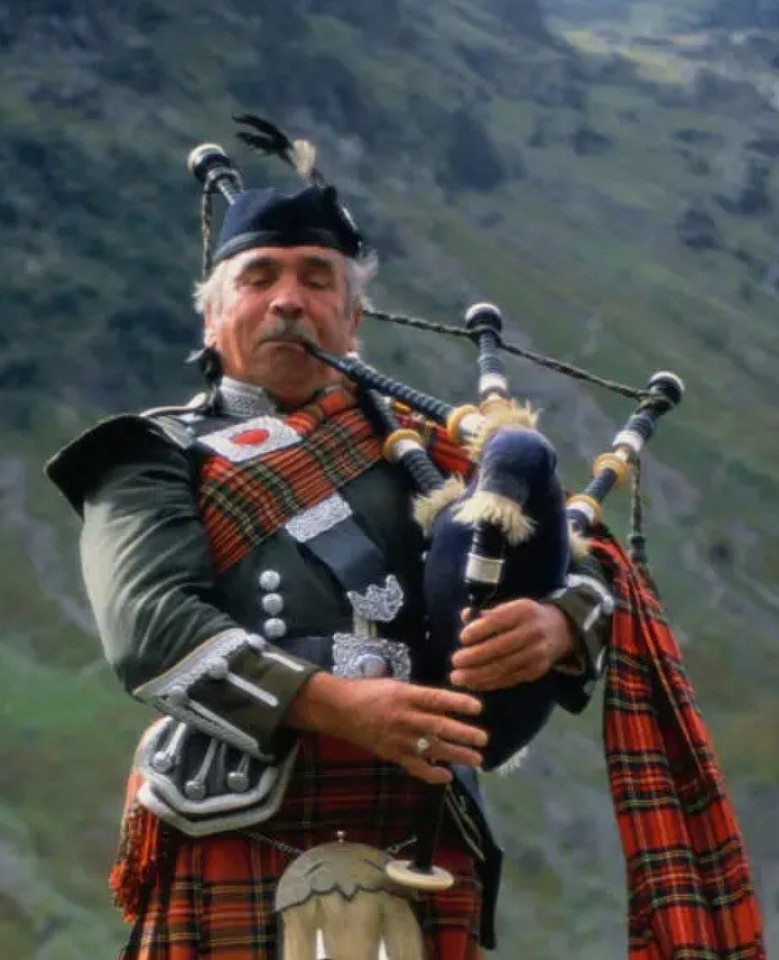
How to Learn A New Tune As An Adult
Many years ago, a good friend commented on a method of teaching he was seeing being used by some very well regarded pipers. He called this 'grunt and slap' method. His point, colourfully enough expressed, was that many teachers show something, then demand a copy, commenting somewhat unclearly when the copy is not exact that the correct answer is not what has been offered, but something else, demanding a further attempt, followed by another grunt that the student has gone too far in the wrong direction, and so on and so forth.
I call this 'progress by differentiation'. This is essentially a negative method (and not by any means confined to teaching piping). Our basic principle should be positive – we explain each element, what it does, how it works, and how to create it, with all of the steps, and if something goes wrong, we analyze the problem with the student and offer positive solutions. We can identify areas for improvement without being negative, and save harsh words if we want to use them for other psychological reasons. If someone asked, “How do you eat an elephant?”, it is likely that you would reply that the best way would be ‘’One bite at a time”.
Music should be treated in a similar way. Learning any pipe tune is a daunting skill, especially for the beginner, but it needn’t be an insurmountable challenge. But the reality is that pipers must memorize their tunes - there’s no music stand on a pipe set. Additionally, we have the actual mechanical part of playing a bagpipe to add to this – moving the fingers and blowing the bag, so there’s lots of stuff we have to do to play our instrument, and it all needs to be done right and executed brilliantly. But too many pipers play certain tunes badly even when they’re skilled, and it’s all because they learned to play the tune muddily in the first place. As you practice, so will you play. So we as pipers and teachers must teach perfection, rather than speed. Let’s start with the Magic Maxim and the Golden Rule.
The Magic Maxim says “If you can play slowly, you can play quickly, but the converse isn't necessarily true.” Martin Docherty, one of my former teachers, always said that if you can play slowly you can always get faster, but the skill of playing slowly should focus on skills that create deep habits, like accuracy and correct timing. In short, there’s no magic to good playing, just practice, and to play perfectly, you have to practice perfection, and that comes only with time. Building speed cannot be schooled over precision, or the tune will sound garbled, muddy, or - even worse - forced. So, the magic maxim must go beyond this, and is essential knowledge on which to base both our individual capacity for precision every time we play, and for a pipe band to play together in synchrony.
Think about taking samples of activity in a classroom at regular time intervals. Imagine we take one photograph at midnight every day. The resulting picture which emerges is that the room is always dark and is never used. That’s what speed does. It creates a false perception. If we double our sampling rate (i.e. half the speed) and take a picture at noon as well (during lunch break...) we see the room is still never used, but that it is light half of the time - it’s a little more precise, but not yet a true rendition of reality. Going further, if we take more pictures at 6am and 6pm, will still tell us no more about what the room is actually used for. Only when we start taking eight sample pictures (thus, slower still) or more per day can we see that the room is used, and then we still have a blurred and inaccurate representation of what it is used for. More pictures, slower speeds, more information, better accuracy. Speed here is illusion. Precision, or more commonly accuracy and frequency, eliminates the errors. The information becomes crisper and more focused. That is what learning music should be.
Breaking a tune into small chunks, playing those chunks slowly and with complete attention to precision and timing, and then joining them into measures, then phrases, then parts, then tunes, helps us develop and remember the fingering, the embellishments and the rhythm as a gestalt - a pattern that can be repeated with focus on speed. Bad habits are very hard to break once they’re established, so learning the tune accurately the first time is essential. Speed comes later - for now, precision and accuracy must take precedent.
Reviewing what we are playing, listening to feedback from our peers, ears and fingers (yes, we really must record ourselves and be able to self-critique) is the same principle as photographing the class room. Our sampling rate is measured in terms of how many times per beat we measure what we are doing, and from there we have a measure of how precisely we are playing. If we start off something new by playing it too quickly, as often happens when we’re in piping school classes or at a massed band practice, we have no time to become aware of, or appreciate our errors, or the details of the rhythm of embellishments, and therefore, we can't necessarily go from there to playing slowly even when forced. However, I have found that going the other way is possible. By starting out with a simple phrase played slowly and precisely, the image of correct, rhythmically proportioned, performance can be created and ingrained into our mind, ready for a tempo change when ready. To do this, we’ll use the five steps described below.
The Golden Rule: “Practice slowly, learn quickly.” In light of the magic maxim, this should be self-explanatory. Many average pipers struggle to learn new music, especially when they’re in a piping school surrounded by others who may be much more proficient, or familiar with the tune. That is a fact, and for most of us, it’s because we’re stressed out, the tune isn’t familiar, and there is a rush to get it done in the time allotted. We can pick up a new song on the radio when we’re at home in minutes. No stress. We can also sing along with the oldies from 50 years ago without forgetting a single word! If I sang out “There she was just a-walkin’ down the street, singing…” there’s not a one of us that couldn’t finish the line in proper pitch and melody. That’s familiarity. But put a new piece of music in front of us, and weeks later we still rely of the sheet music, we’re hesitant, we’re fudging the melody. Why is this? Let’s examine some possibilities and see if we can correct them.
Piping Schools by necessity teach by rote. They have a lot of students and a few teachers, and everyone is trying to get what they can out of the time in school, so there’s maximum competition for attention and time, and little support during the class. That means most instructors will tell pipers to look at the notes of a new tune and try to remember the sequence, timing, and tempo. They then proceed to analyze the note values and dots and cuts and embellishments, usually using some sort of rhythm sound, like clapping or foot stomping, then they will play the entire tune at tempo. This is followed by a massed cacophony as all those at the table attempt to reproduce what they have heard, following the music in front of them, or it’s a painful round-the-table individual attempt that gets more ragged and less accurate, followed by an information overload as the instructor tries to correct what problems he or she has with the interpretation. A few instructors may even have the students visualize the sheet music in their heads, trying to memorize the notes without understanding the music that the notes are singing!
This is awful instruction, by the way. It’s chaotic, frustrating and impersonal, and helps no one. By not connecting the written score to the MUSIC, students are left with little confidence in how the tune is supposed to sound. One wrong note takes them completely off track, especially when they are playing the same sequence over and over on the chanter, reinforcing bad habits and poor technique. Add competition, peer pressure and anxiety to the mix, and the student is now primed for failure. The outcome is usually a very unsatisfactory, inaccurate, muddy performance that other pipers will notice later. Correcting the problem now will require going back to basics. And sadly, basics mean tedium, but tedium and exercises work by creating new pathways in the brain. The more repeats, the deeper the path. It’s that simple, and that boring.
My advice is if you have a new piece to learn, don’t try playing it out immediately - put the chanter down. Now, listen to the melody. I use YouTube and Jim McGillivray’s site a lot for this, so I can hear the tune and see it being played as it should sound in my head while I follow it on the music in front of me. I then hum it a few times to get a sense of the tune. If you have an audio recording, you can sit back, close your eyes, and listen to that section. Hum things to yourself a few times. Singing the tune makes it music, and from that comes the skeleton all of the embellishments hang on. Sing it or hum it SLOWLY. Because that’s the secret. Look at the first two measures of the tune only and figure out the melody within.
Try to sing the first two measures of the melody without thinking about doublings or gracenotes. Once it’s locked in, pick up your practice chanter and refer to the sheet music. Sing the measure while you finger the notes on the chanter a few times, then try to play it on the chanter as you sing it in your head. Don’t ever go fast here - we are aiming for ACCURACY, not TEMPO - because speed at this time while you’re trying to memorize the tune is the enemy. I recommend that when you’re playing it on the chanter, you again eliminate all but grace note embellishments. Let your fingers just play the basic melody slowly and accurately, getting the tune right and the timing right, but at a slow speed. Remember, we’re breaking it up, so just the first two measures for now.
Go back to singing the melody and making the fingers move, then play the tune on the chanter again. Go over this sequence a few more times to lay some groundwork and muscle memory. Now, you will want to work the full embellishments into place, but not to the detriment of the melody. Open up the embellishments so they are in position, and get them defining the rhythm of the melody. If necessary, slow the whole sequence further down until you have the desired rhythm. Again, do not play fast - play precisely. Remember - slow and accurate.
Finally, try the measure with and without looking at the music alternately. Once you can sing and play the first two measures accurately, without looking at the sheet music, it’s time to go onto the next two measures (3 & 4). Do the same sequence to learn them as before. When you can comfortably play the first two measures and the second two measures accurately and in good time, you now link them together and sing/play them as a complete unit. Go over the full part a few times to “cement” the melody into your head and fingers.
Now you’re ready to look at and learn measures 5 & 6. In many instances, these might be the same or similar to measures 1 & 2. Lastly look at and learn measures 7 & 8, and as before, combine them into a unit. These measures will be very important and may repeat through the tune. Use the same sequence as you did before - sing it, sing and finger it, play it with music, then play it without. Learn the sequences well. Each pair of measures make a statement. A question, and an answer. Play them as such.
Only when you have the first part of the tune baked into your head and your hands should you go onto subsequent parts, otherwise you’ll only confuse yourself and totally impede your ability to learn the tune. If you’re making mistakes, stop. This isn’t a competition, and you don’t have to do this all at once. Unlike eating an elephant, you have plenty of time to do this. Relax. Take a break. Come back in 30 minutes and start the sequence again. As you work through the tune, you’ll discover that certain phrases are repeated. There is both logic and rhythm that transforms the notes into MUSIC and helps you to memorize the tune!
The Kilt - a history of a dress style
One of the first things that people tend to associate with Scotland is the tartan. While its association with Scotland is strong, tartan-like patterns have actually been found globally, with examples as far away as the Middle East and Indian subcontinent dating back to 3000 BC. In Scotland, the earliest known true Scottish tartan, the Falkirk tartan, dates to around 250 AD. Although it’s a national treasure, many of us are unaware of the history behind tartan. With this in mind, let's take a closer look into what tartan is, tartan's origins, and its presence in today’s world.
Today, largely through the power of film and festivals, more and more people are becoming interested in their Scottish heritage. One of the most visible signs of that heritage is the proud tradition of wearing various renditions of Highland Dress. However, as tartan and the kilt became more popular in the last 50 years, it seems that the myths and misperceptions about them continue to spread even more rapidly, especially regarding the history of Highland Dress. William Wallace was portrayed wearing a “great kilt” in Braveheart (yeah, the great kilt actually was not worn in that era), or stage productions of Macbeth with the actors dressed in modern kilts and plaids (which were not even invented at the time), and pipe bands in full military kit performing at “Renaissance” festivals only add to the confusion.
What is Tartan?
Quite simply, a tartan or plaid is just a type of design on a woven material. The horizontal weft threads cross over the vertical warp threads to create a check. As the check builds, the design begins to mirror and repeat, creating a traditional Scottish Tartan.
The official definition of the word ‘tartan’ according to The Scottish Register of Tartans Act 2008) Section 2 is: “A design which is capable of being woven consisting of two or more alternating coloured stripes which combine vertically and horizontally to form a repeated chequered pattern.”
Tartan fabric is considered a symbol of Scottish identity. It is traditionally made of dyed wool thread, which is woven into a recognizable and repeatable pattern of simple checks, forming a bolt of cloth that is used in clothing and textiles. Initially, the yarns were dyed using natural dyes from native plants, and usually found in only two or three colours, so there was a lot of variance between each thread and weave. Today, with the development of chemical dyes, they can be found in a larger variety of colours and patterns, standardized and reproducible for the mass market. There are so many different combinations of coloured stripes and base colors, so much so that there are roughly 3000 types of tartan now on the official register, and thousands more still used for fashion choices and decoration worldwide. However, despite agencies such as Temu and Shein, only true tartan is used to make a variety of traditional Scottish items including the famous Scottish kilt.
In the Beginning
If one were to go back in time and visit the Highlands of Scotland about 1000 years ago, you wouldn’t see anyone wearing anything that even remotely resembles the modern kilt. The standard garment of the Gael (both in the Highlands of Scotland and in Ireland) was a tunic called a léine, worn over long pants or trews, a Viking invention. Léine is simply the Gaelic word for “shirt” and the styles varied according to the time period. Initially it was a rather simple long tunic, open at the sleeve and pulled on over the head, worn long to mid-calf by the women and either mid-thigh or to the knee by the men, and belted in place with a simple leather belt and penannular clasp.
The trews were considered disposable, because they were woven out of carding scraps, containing seeds, burrs and bits of vegetation that couldn't be easily removed from the fine wool being spun into yarn. Tied around the waist at the top, they were primarily coverings for protection against sharp rocks and other environmental hazards, as well as enclosures for warmth while out on the wilds. They were used hard and washed only when possible, so they obviously became torn, grimy and offensive over time, and were frequently not worn unless absolutely needed for those reasons. Hose made of fine linen thread began replacing them instead - expensive, custom made, and patterned, hose became the mark of the socially successful person.
By the beginning of the sixteenth century the léine had also evolved into a rather elaborate garment that was very full, having sleeves that hung down from the elbow to the knees, and into styles that were either pull-over or that wrapped around and closed with ties and ribbons or leather straps rather like a bathrobe. The belts, too, had become ornate and the buckles complex and decorative, with straps for swords and knives added. The most common color of the léine was saffron, although other colors were possible, but for the most part for all but the very wealthy they were undyed.
So what, I hear you ask. Well, over all this kit, for warmth in Scottish society, a large woolen blanket, shawl or wrap secured by a metal clasp at the shoulder was often worn. This woven mantle was called the brat in Ireland, and in later centuries was called a plaidh in Scots Gaelic (the word originally meant “blanket”). Though tartan cloth was not as common in Scotland then as it would become in later times, these wraps were a woven tartan pattern, because we have archaeological evidence of cloaks of tartan cloth being worn in Scotland from the third or fourth century.
The Belted Plaid
It is this tartan wrap or blanket that would later evolve into the kilt. As I stated previously, the fashion in sixteenth century Gaelic Scotland was for very full clothing. Remember, the idea was the more fabric you had in your clothing, the more affluent you must be! However, with the cost of wool dropping towards the end of the sixteenth century in Scotland woolen plaids began to grow larger with the fashion. At a certain point, people began to gather these large plaids into folds and belt them about the waist, finally forgoing the coarse (and prickly) trews forever as common dress. This gathered wrap became the belted plaid. In Gaelic it was called either feileadh-mór, which means “great wrap,” or breacan-an-feileadh, which means “tartan wrap.” In modern parlance, they are often referred to as “great kilts.” The earliest mention of this garment in the historic record comes from the Life of Red Hugh O’Donnell, written in Irish Gaelic in 1594. This work describes Scottish mercenaries from the Hebrides being noticeable among the Irish because of the difference in their dress. The Scots had risen, naked but for hair shirts, taken up their long blankets, folded them about their waists with the extra length pulled over their shoulders to cover their heads and backs, and then pulled and fixed their belts outside their mantles – the belted plaid.
This garment was about 4 to 6 yards long and on average 50” to 60″ wide (made from two lengths of 25” to 30″ wide cloth sewn together). The length of the cloth was simply gathered up and belted at the waist, with the lower part hanging above the knees and the upper part being brought up to the shoulders and arranged in any number of ways. There were many different ways of wearing the belted plaid, and this garment apparently became the ubiquitous dress of the Highland men during the seventeenth and first half of the eighteenth centuries (isolated instances of its use can be found as late as 1822, but this was likely for ceremonial purposes only – it had long ceased to be a part of daily dress). The female version was the arisaid, which contained somewhat less cloth, was worn long, to the ankles, and usually was made from a white tartan with a wide spaced setting.
Tartan at this time was becoming almost synonymous with Highland Dress, though plaids in solid colors were also worn (as can be seen in the 1618 portrait of the chief of the Campbells of Lochawe). More about that later.
The Phillabeg
If the belted plaid is the grandfather of the modern kilt, then the phillabeg is the father. Phillabeg is the Anglicized spelling of the Gaelic feileadh-beag, which means, “little wrap.” It refers to a garment that is essentially the lower half of the belted plaid. Many today use “phillabeg” to refer to the modern tailored kilt, but the original phillabeg was untailored. Like the belted plaid, it consisted of a length of cloth, usually about 4 yards long, but only 25” wide. In other words, just the lower portion of the belted plaid, without another length of cloth stitched to it. It also was gathered loosely into folds and belted about the waist, the bottom reaching to just above the knee and the top few inches folded and overlapping the top of the belt. Often another length of cloth (what would have been the upper part of the belted plaid) could be worn separately over the shoulders for warmth or protection from the elements.
Much speculation abounds regarding the appearance of the phillabeg. Most historians feel confident in putting its origins towards the mid-to-late seventeenth century. Certainly by the early eighteenth century it was in widespread use, because the belted plaid was a bother to get into and wear. The phillabeg was worn most definitely in the eighteenth century, its use declining after the 1790s when the modern three-buckled tailored kilt was introduced, though it continued to be worn by some as late as the 1820s.
People are fond of recounting the story of how one Thomas Rawlinson, an English weaver and mill owner, supposedly “invented” a beltless phillabeg in the first quarter of the eighteenth century in order to prevent his male Scots workers from getting their kilts caught in the looms, thus scandalising the ladies and interrupting his business. He decided to take 8 feet of tartan and sew it into a wrap with for buckles, two on each side, so the kilt could be worn with pride as well as safety. Wonderful though the story is, the evidence against is lies in multiple paintings and armorial bearings that depict men in what appear to be buckled phillabegs that long pre-date Rawlinson and his buckled mini-kilt. Most likely the buckled version of the feileadh-beag came about as a natural evolution from the feileadh-mor, and the fashion spread around the Highlands of Scotland over time, with tales about Mr. Rawlinson and others helping it along.
The Kilt
Now we have finally come to it. The universal symbol for the Scotsman—the modern, 8 yard, knife-pleated tartan kilt. The tailored kilt differs from the phillabeg in that instead of simply being gathered and belted on, the pleats in the kilt are actually sewn down.
The first instance that we have of this is records of kilts issued by the British military in the 1790s. These first tailored kilts were box pleated to the line. There was no tapering, the pleats were sewn down about 5 inches, and the length of the kilt was selvedge to selvedge (about 25”). The amount of cloth used was between 3.5 and 4 yards, covered by a separate kilted apron of canvas or leather. During the early Victorian era, tailored kilts for civilian wear soon followed suit, only these initially weren't pleated to anything (i.e. to no particular line or pattern), until about 1820 when they, too, began to be pleated to the line as conformity and neatness became fashionable.
The amount of cloth used in the kilt grew to about 5 yards in the mid nineteenth century, as the pattern of the tartans became larger and the box pleats became narrower. In 1853 the Gordon Highlanders were the first regiment to adopt the knife pleat. By the year 1900 knife pleating was the de rigeur in all civilian kilts, and the idea of “pleating to the sett” (i.e. arranging the pleats so that the pattern of the tartan was unbroken) became popular. This new form of pleating caused the amount of cloth used in a kilt to grow to six, seven, even eight or more yards of tartan cloth!
There is a myth today that a true kilt should contain 8 yards of cloth—no more, no less. Any kiltmaker worth his salt would tell you otherwise, but it’s actually a false claim, because what truly determines the amount of cloth in a kilt is the size of the repeat of the tartan, and of course the size around the wearer! The modern civilian kilt has anywhere from 6 to 10 yards of cloth. Recently kilmakers have begun to also offer options that have 4 and 5 yards, a much more comfortable choice that hearkens back to when the kilt was worn as part of the daily dress.
Also, the details of the tailored kilt itself have evolved over time. Waistbands, linings, straps and buckles were added as fashions changed to make it easier to put on, hang up and launder. And what was worn with the kilt changed as well, to reflect the changing fashions of society. We will not delve into such matters as jackets, caps, hose, sporrans, brogues and the like here, but suffice it to say that money and fools make a party.
Which Scottish clans were the most powerful?
Dating back to the medieval era, to a time when the Norsemen were driven out of the Highlands and Islands by the Scottish kings, the clan system shaped the political landscape of Scotland for centuries. The modern history of Scotland – including its relationship with England and Ireland – is inextricably linked with the ferocious and fiendishly complicated feuds and fights between these groups as they battled for control of fiefdoms.
Historically there were hundreds of clans spread across Scotland and Ireland, all with their own distinct chiefs, holdings and politics, but the system also included ‘septs’ – families that shared land with a clan and swore allegiance to the chief.
The Standing Council of Scottish Chiefs, an organisation established in 1951 that claims to be the primary authority on clans, recognises 135 distinct existent clans, while the Lord Lyon King of Arms, a position that has existed since at least 1377, officially oversees Scottish heraldry.
Clanship still exists in many forms, not least in the surnames of many millions of people of Scottish descent around the world. The word stems from the Gaelic clann, meaning ‘children’, and even today, around a third of families living in Scotland are connected to a clan.
KEY CLANS
The powerful Clan Campbell controlled much of western Scotland around Argyll and Loch Awe (but also Perth and Kinross, and Nairn) and played a pivotal part in the major events in modern Scottish history, including the Wars of Scottish Independence, during which they fought on the side of Robert the Bruce at the Battle of Bannockburn (1314) and elsewhere.
However, they opposed the Jacobite Risings and, infamously, soldiers from Clan Campbell of Glenlyon turned upon and slaughtered members of Clan MacDonald, who had been hosting them, during the Massacre of Glencoe on 13 February 1692. At least 30 MacDonalds were murdered that morning, in an event that still scars Scottish history.
The Campbells also fought on the side of the British crown at the decisive Battle of Culloden in 1746 and were instrumental in the suppression of Highland Uprisings in the 18th and 19th centuries. Clan Campbell members formed the basis of The Black Watch, along with three other clans, an infantry battalion of the Royal Regiment of Scotland established initially by the British to patrol the Highlands and suppress insurgencies.
Arguably Scotland’s biggest and oldest clan is Clan Donald, also known as Clan MacDonald or Clan McDonald. With roots that are Norse-Gaelic and join up with ancient Irish royalty, the clan’s name (Clann Dhòmhnaill, children of Donald) originates with Domhnall mac Raghnaill, a powerful Hebridean noble active in the mid-13th century, whose grandfather Somerled was a Norse-Gaelic warlord and the original Lord of the Isles.
The Donalds also fought for Scottish independence with Robert the Bruce before a destructive civil clan war between John MacDonald of Islay and his son, Angus Og MacDonald – which came to a head in the Battle of Bloody Bay in 1481 – weakened the clan and resulted in loss of the Lord of the Isles and Earl of Ross titles in the late 15th century, leading to a great fracture in Highland society.
The Wars of the Three Kingdoms (1639–1651) and Jacobite uprisings put the MacDonalds and the Campbells on opposing sides, and the Massacre of Glencoe cemented the blood feud. The various branches of the MacDonalds supported the Jacobite uprisings in 1715 and 1745.
Many clans spanned the Irish Sea and some wielded power beyond the British Isles. Clanship still exists in many forms, not least in the surnames of hundreds of thousands of Scots. The word stems from the Gaelic clann, meaning ‘children’, and even today, around a third of families living in Scotland are connected to a clan.
Historically there were hundreds of clans spread across the Scotland and Ireland, all with their own distinct tartans, crests and mottos, but the system also included ‘septs’, families that shared land with a clan and swore allegiance to the chief.
How many Scottish clans are there?
The Standing Council of Scottish Chiefs, an organisation established in 1951 that claims to be the primary authority on clans, currently recognises 135 distinct existent clans, while the Lord Lyon King of Arms, a position that has existed since at least 1377, officially oversees Scottish heraldry.
FOLK HEROES
Other major clans include the MacLeods, who were famed for their warrior traditions and were caught up in the civil clan war that tore Clan Donald apart. They continued to feud with Clan MacDonald of Sleat through the 15th and 16th centuries.
Clan MacGregor, meanwhile, is famous thanks to the antics of one of their kin, Rob Roy MacGregor, who fought with the Jacobites (as did his clansmen) before becoming an outlaw and leading a campaign against the Duke of Montrose and the British Crown in the late 17th and early 18th centuries. He is heralded as a Scottish folk hero, largely thanks to Sir Walter Scott’s romanticised accounts of his exploits.
Clan Stewart were a historically powerful force directly connected to the Royal House of Stewart, which ruled Scotland (and later Britain and Ireland) for centuries.
Rivals of Clan Stewart were Clan Douglas, who were involved in multiple feuds and once laid siege to Edinburgh Castle. William Douglas, 8th Earl of Douglas, was murdered by King James II of Scotland who stabbed him in the throat during a dinner at Stirling Castle in 1452 when Douglas refused to swear fealty.
Although famous for one of its members, Clan Wallace is actually a small Lowlands Scottish Clan originally from Wales (the name of Waleis was common in England and around 1300 meant simply “Welsh-man”. The family held lands in Shropshire an may have come north with King David I of Wales in 1278). The most famous member of the clan was the Scottish patriot William Wallace of the late 13th and early 14th centuries, a Scottish patriot and freedom fighter, whose freeholder family was part of the larger Clan Wallace. Wallace was the laird holder of family estates in Ayrshire.
-- Pat Kinsella, BBC History
